 Save
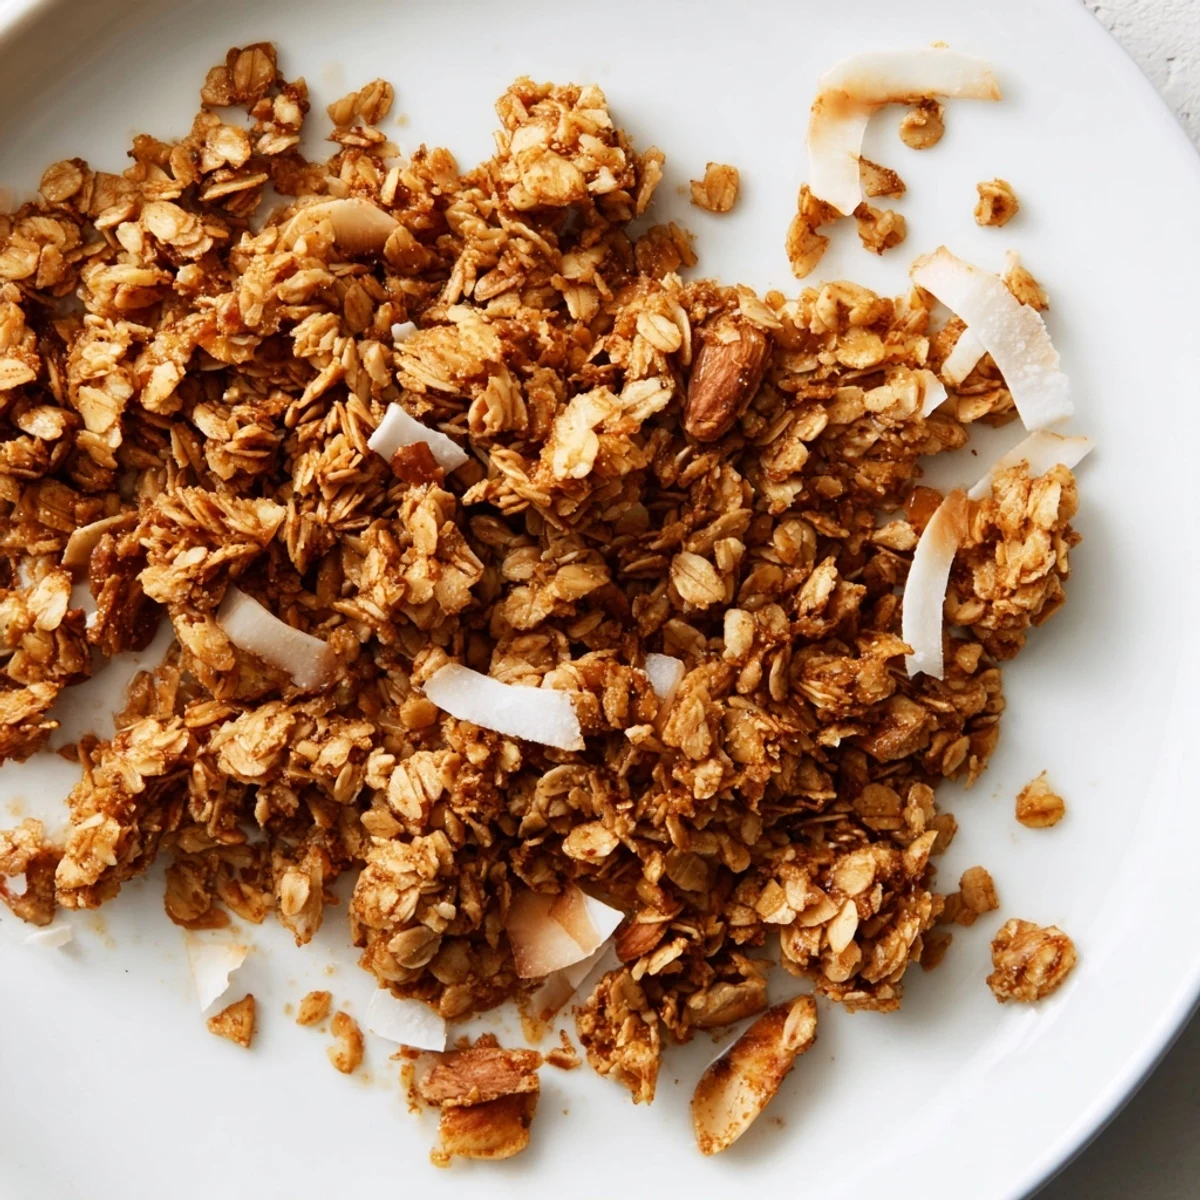
Save This crunchy almond granola features toasted rolled oats combined with coarsely chopped almonds and a hint of cinnamon. Sweetened naturally with maple syrup or honey, and enriched with melted coconut or olive oil, it bakes to a golden crisp that’s perfect for breakfast or snacking. Optional dried fruit and seeds add texture and flavor. Store in an airtight container to maintain freshness for up to two weeks.
I still remember the morning I decided to stop buying those expensive boxes of granola from the farmer's market. My daughter had asked why homemade couldn't taste just as good, and honestly, I didn't have a good answer. So one quiet Saturday, I experimented with what I had in the pantry—oats, almonds, a drizzle of maple syrup—and within thirty minutes, my kitchen smelled like a cozy café. That first batch, still warm from the oven, tasted like something between a secret and a triumph. Now I make it constantly, and my family has stopped asking why we don't buy the store version anymore.
I'll never forget when my friend Sarah came over one morning and caught me pulling a sheet of golden granola from the oven. She took one bite straight off the warm pan and her eyes went wide. 'This is homemade?' she asked, genuinely shocked. That was the moment I realized this recipe wasn't just breakfast—it was something I could offer people that tasted like care and intention.
Ingredients
- Old-fashioned rolled oats (3 cups): The heart of your granola—they provide that satisfying chew and toasted flavor. Don't use instant oats; they'll turn into dust. I learned this the hard way on my first attempt.
- Raw almonds, coarsely chopped (1 cup): These toast beautifully and stay crunchy. Chopping them yourself lets you control the size and adds a personal touch that pre-sliced almonds just don't give.
- Unsweetened shredded coconut (1/2 cup, optional): Adds a delicate sweetness and tropical note. I skip this sometimes when I want pure almond flavor to shine.
- Ground cinnamon (1/2 teaspoon): The spice that makes people stop and ask what smells so good. A generous pinch transforms everything.
- Salt (1/4 teaspoon): The secret ingredient nobody talks about—it amplifies the sweetness and brings out the nuttiness.
- Maple syrup or honey (1/3 cup): The binder that holds everything together and caramelizes into golden clusters. I prefer maple syrup for its deeper flavor.
- Coconut oil or olive oil, melted (1/4 cup): This coats everything evenly and ensures even toasting. Don't skip it; it's what creates those addictive crunchy bits.
- Pure vanilla extract (1 teaspoon): A whisper of warmth that rounds out all the other flavors beautifully.
- Dried cranberries or raisins (1/2 cup, optional): Add these after baking to keep them chewy rather than hard. I've learned that timing matters with these.
- Pumpkin seeds or sunflower seeds (1/4 cup, optional): Extra nutrition and a surprising texture element that keeps each bite interesting.
Instructions
- Set your stage:
- Preheat your oven to 325°F and line a large baking sheet with parchment paper. This temperature is gentler than you'd think, but it's exactly right—it allows the oats and almonds to toast evenly without browning too quickly on the outside while staying pale inside.
- Build your base:
- In a large bowl, combine the rolled oats, coarsely chopped almonds, coconut if you're using it, cinnamon, and salt. Use your hands to mix if you want; there's something satisfying about feeling the ingredients come together. The cinnamon should be distributed throughout so every bite has a hint of warmth.
- Create the binding magic:
- In a smaller bowl, whisk together the maple syrup, melted coconut oil, and vanilla extract. This is your adhesive—it's what will make the oats and almonds bond into clusters rather than staying separate. Take your time whisking; you want it smooth and well combined.
- Bring it all together:
- Pour that wet mixture over your dry ingredients and stir until everything is evenly coated. This is the moment when it goes from separate ingredients to something unified. I use a wooden spoon and stir in circular motions until I can't see any dry oats peeking through.
- Spread and bake:
- Spread the mixture in an even layer on your prepared baking sheet. Try to keep it fairly consistent so everything toasts at the same rate. Bake for 25 to 30 minutes, stirring once about halfway through. The stirring is important—it prevents the edges from burning while the center stays pale.
- The patience part:
- Remove the granola from the oven when it's golden brown and the kitchen smells absolutely irresistible. Here's the hardest part: let it cool completely on the baking sheet. I know it's tempting to eat it warm, and you absolutely can, but as it cools, it will crisp up beautifully. You'll hear it crackling and settling as it cools—that's exactly what you want.
- The final touch:
- Once it's completely cool, stir in your dried cranberries, raisins, or seeds if you're adding them. This ensures they stay chewy and don't dry out further in the oven.
- Store your treasure:
- Transfer to an airtight container. It will keep at room temperature for up to two weeks, though honestly, it rarely lasts that long in my house.
 Save
Save There's something about homemade granola that transforms an ordinary breakfast into a small ritual. My kids now request it by name, and my partner started adding it to his coffee somehow, which I still don't quite understand but has become our inside joke. It's become more than food in our house—it's become a reason to slow down.
The Art of Customization
One of the greatest gifts of making your own granola is the freedom to make it exactly how you want it. I've learned that granola is incredibly forgiving when it comes to swaps. Pecans for almonds? Beautiful. Walnuts for sunflower seeds? Absolutely. A touch of orange zest with the cinnamon? Chef's kiss. The foundation stays the same—oats, fat, sweetener, heat—but the possibilities genuinely feel endless. I've made versions with cardamom for dinner guests, with extra cinnamon and nutmeg for fall mornings, and once with crystallized ginger because I was curious. Each version taught me something new about flavors I thought I understood.
Serving Suggestions and Pairings
Granola is beautifully versatile, which is part of why I love it so much. The obvious pairing is with yogurt or milk for breakfast, but I've discovered it deserves more credit than that. Sprinkle it over smoothie bowls for textural contrast. Layer it with whipped cream and fresh berries for a simple dessert. Mix it into softened vanilla ice cream for texture. I once even used it as a crust for a cheesecake, and it was unexpectedly wonderful. The real magic happens when you think of granola not as just breakfast food, but as a topping that brings crunch and warmth to almost anything.
Storage and Keeping It Fresh
The longevity of homemade granola has genuinely surprised me. In an airtight container at room temperature, it stays crispy for up to two weeks, though I'd encourage you to eat it faster than that—not because it goes bad, but because it's too good to have waiting around. I use glass containers with tight lids because they seal better than plastic, and I always write the date on mine so I remember when I made it. One learned tip: keep it away from humidity. A damp kitchen from cooking steam can soften it, but a good seal and a cool, dry spot keep it perfect.
- Use glass containers with airtight seals for the best storage
- Keep it in a cool, dry place away from steam and humidity
- Make a fresh batch every week or two for the optimal taste and texture experience
 Save
Save Making granola has become one of those small kitchen rituals that reminds me why cooking from scratch matters. It's simple enough to do on a quiet morning and impressive enough to make you feel genuinely proud. Welcome to the club of people who make their own.
Common Recipe Questions
- → How do I achieve a crunchy texture?
-
Baking the granola at a moderate temperature and stirring halfway ensures even toasting and crunchiness.
- → Can I substitute almonds with other nuts?
-
Yes, pecans, walnuts, or hazelnuts work well and offer different flavor profiles.
- → Is it possible to make this granola vegan?
-
Use maple syrup instead of honey and ensure all other ingredients are plant-based.
- → How should I store the granola to keep it fresh?
-
Keep it in an airtight container at room temperature for up to two weeks to retain crispness.
- → What are some optional mix-ins to try?
-
Dried cranberries, raisins, pumpkin seeds, or sunflower seeds add extra flavor and texture.
