 Save
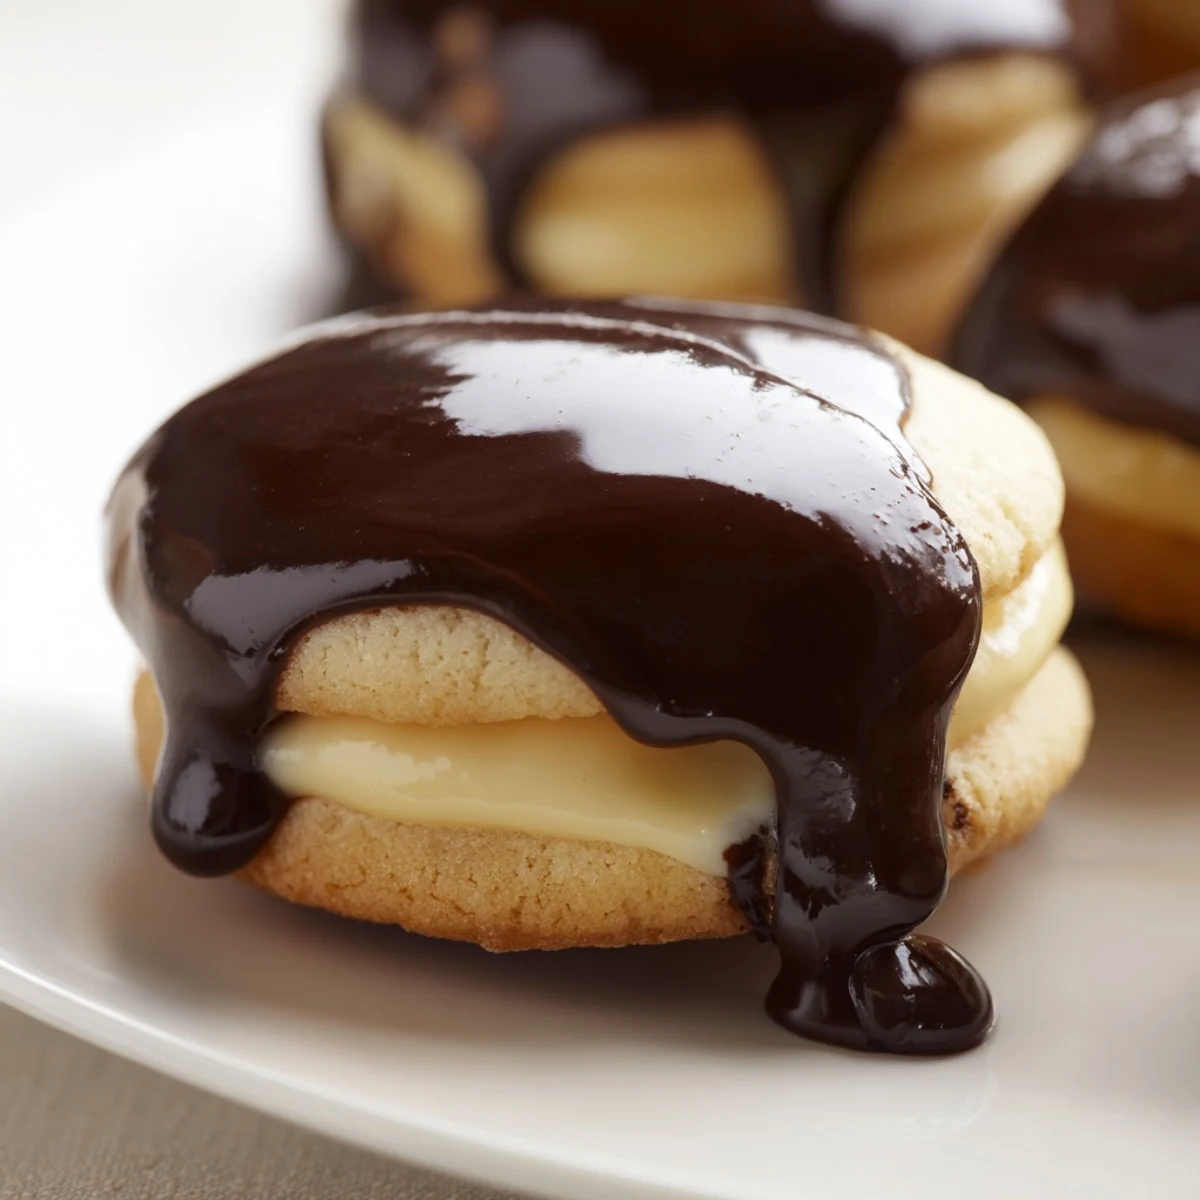
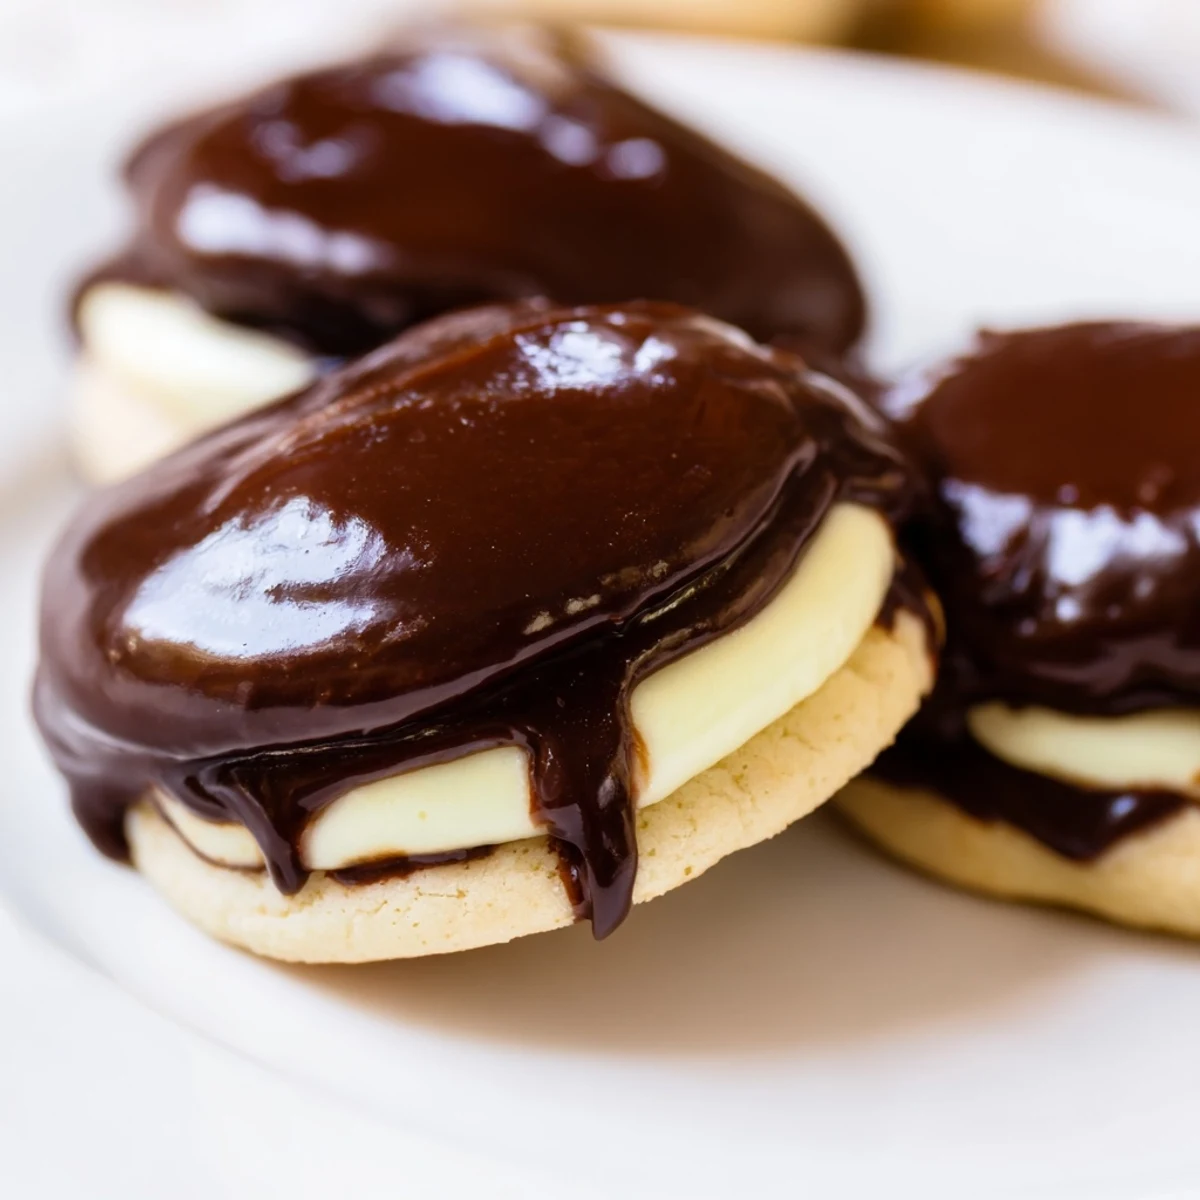
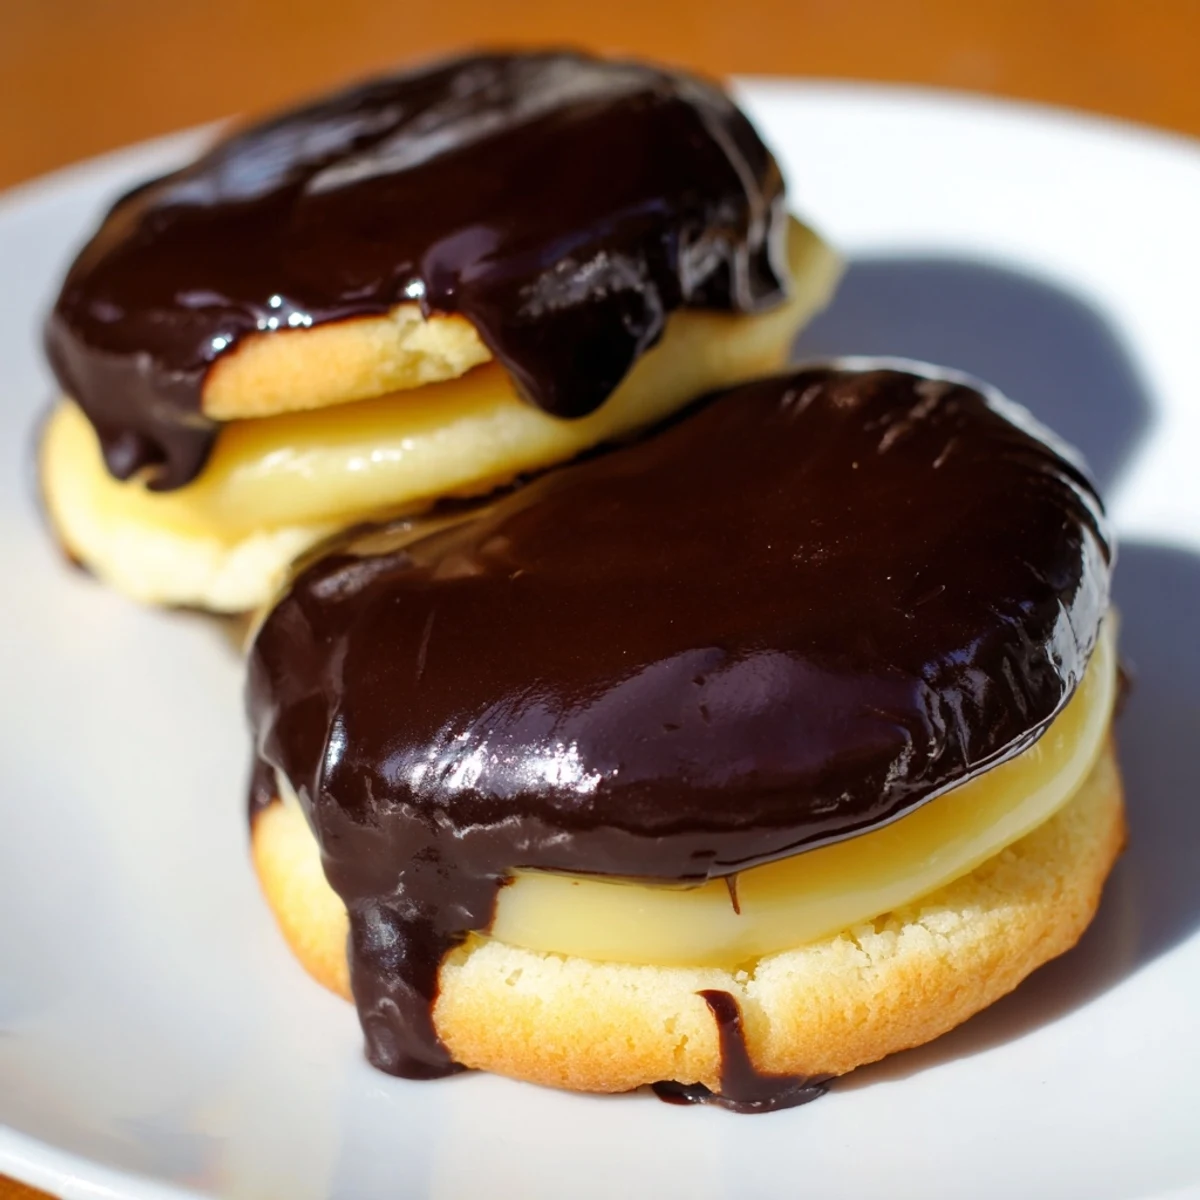
Save These delightful miniature treats capture all the beloved flavors of Boston cream pie in an easy-to-eat format. Soft vanilla cookies serve as the foundation, sandwiching a silky homemade custard that's perfectly balanced with vanilla. The crowning touch is a luscious chocolate glaze that sets to create that signature chocolate topping.
The process involves making a simple vanilla cookie dough, preparing a stovetop custard thickened with cornstarch, and creating a glossy two-ingredient chocolate topping. While the custard requires careful whisking to prevent scorching, the results are absolutely worth the effort.
Perfect for gatherings, these handheld desserts combine textures beautifully — the tender cookie, the smooth creamy filling, and the crisp chocolate coating create an irresistible trio. Make them ahead and store chilled for the ultimate grab-and-go sweet treat.
The first time I attempted Boston cream pie, I made the mistake of trying to assemble it while the custard was still warm. The chocolate slid right off into a sad puddle on the counter, and my husband still brings up that glorious disaster whenever I suggest making dessert. These cookie bites became my redemption — all the flavors I love, but in a form that forgives my impatient nature and actually lets me enjoy the process.
My sister came over last month when I was testing this recipe, and we ended up sitting at the counter with coffee, eating three straight from the cooling rack and talking until the sun went down. Thats the kind of dessert this is — the one that keeps you lingering, fingers slightly sticky from chocolate, wondering why you ever bother with anything else.
Ingredients
- All-purpose flour: The foundation of these soft cookies, providing just enough structure to hold the filling
- Unsalted butter: Room temperature butter is non-negotiable here — it creates the tender crumb that makes these cookies melt in your mouth
- Granulated sugar: Sweetens the cookies while helping them spread slightly into perfect rounds
- Vanilla extract: Use the good stuff — it shines through both the cookies and custard
- Whole milk: Creates a rich, velvety custard that wont turn into a gloopy mess
- Egg yolk: The secret to thick, luxurious custard without needing a dozen eggs
- Cornstarch: Ensures the custard sets up firm enough to pipe without oozing out
- Semi-sweet chocolate: The perfect balance for the glaze — not too bitter, not cloyingly sweet
- Heavy cream: Makes the chocolate ganache glossy and ensures it sets with a slight snap when you bite down
Instructions
- Preheat your oven:
- Set it to 350°F (175°C) and line a baking sheet with parchment paper — this saves you from scrubbing baked-on cookie mess later.
- Whisk the dry ingredients:
- Combine flour, baking powder, baking soda, and salt in a bowl, then set it aside while you work on the wet ingredients.
- Cream the butter and sugar:
- Beat them together until the mixture looks pale and fluffy, about 2-3 minutes, then add the egg and vanilla extract until everything is incorporated.
- Combine everything:
- Gradually add the dry ingredients to the butter mixture, alternating with the milk, until a soft dough comes together — do not overmix or the cookies will be tough.
- Shape the cookies:
- Scoop tablespoon portions and roll them into balls, then place them on your prepared sheet with 2 inches of space and flatten slightly with your palm.
- Bake until perfect:
- Bake for 10-12 minutes until the edges are barely golden — they might look underdone in the center, but that is exactly how you want them.
- Make the custard:
- Whisk together milk, sugar, egg yolk, cornstarch, vanilla, and salt in a saucepan over medium heat, stirring constantly until thickened, about 3-4 minutes.
- Cool the custard properly:
- Press plastic wrap directly onto the surface to prevent a skin from forming, then refrigerate until completely set.
- Prepare the chocolate glaze:
- Microwave chocolate, cream, and butter in 20-second bursts, stirring until smooth and glossy, then let it cool slightly so it thickens up.
- Assemble the bites:
- Pipe or spread about 1 teaspoon of custard onto the flat side of half the cookies, top with the remaining cookies, and spoon glaze over each sandwich.
 Save
Save My daughter helped me dip the last batch, and her technique was far from perfect — chocolate dripped everywhere, cookies were sliding around — but they were gone before the chocolate even fully set. Sometimes the imperfect ones taste the best.
Make Ahead Magic
The cookie shells freeze beautifully for up to a month, and the custard keeps in the fridge for three days. I often bake the cookies on Sunday and make the custard Monday night, so Tuesday evening assembly takes all of twenty minutes.
Flavor Twists That Work
A splash of dark rum in the custard takes these from delightful to downright sophisticated. My brother-in-law still talks about the espresso version I made for his birthday — just dissolve instant espresso in the milk before cooking the custard.
Assembly Tips From The Trenches
After dozens of batches, I have learned that a piping bag gives you the prettiest results, but a simple ziplock with the corner snipped off works just as well. Work quickly once you start glazing, and have a cooling rack ready.
- Chill the assembled cookies for 10 minutes before glazing to help the chocolate set faster
- If your glaze is too thick, add another teaspoon of warm cream and stir
- Use a toothpick to help guide the chocolate down the sides for that classic drizzle look
 Save
Save These are best eaten the same day, but somehow they never last that long in our house anyway.
Common Recipe Questions
- → Can I use store-bought custard instead of homemade?
-
Yes, instant vanilla pudding or premade custard works perfectly as a time-saving shortcut. Simply prepare according to package directions and chill before assembling. The flavor will still be delicious, though homemade custard offers a richer, more traditional taste.
- → How should I store these cookie bites?
-
Store in an airtight container in the refrigerator for up to 3 days. The custard filling requires refrigeration for food safety. Let them sit at room temperature for 10-15 minutes before serving for the best texture and flavor experience.
- → Can I freeze Boston cream cookie bites?
-
Yes, freeze assembled cookies without the chocolate glaze. Place in a single layer on a baking sheet until frozen, then transfer to a freezer-safe container. Thaw in the refrigerator overnight and add chocolate glaze just before serving.
- → What's the best way to melt the chocolate for the glaze?
-
Microwave in 20-second intervals, stirring between each burst. This prevents overheating and seizing. Alternatively, use a double boiler on the stovetop for more control. The glaze should be smooth and glossy but slightly cooled before spooning over the cookies.
- → Can I make the cookie dough ahead of time?
-
Absolutely. Wrap the dough tightly in plastic and refrigerate for up to 2 days before baking. You can also scoop the dough balls, freeze them on a baking sheet, then store in a freezer bag for up to 3 months. Bake from frozen, adding 1-2 minutes to the baking time.
