 Save
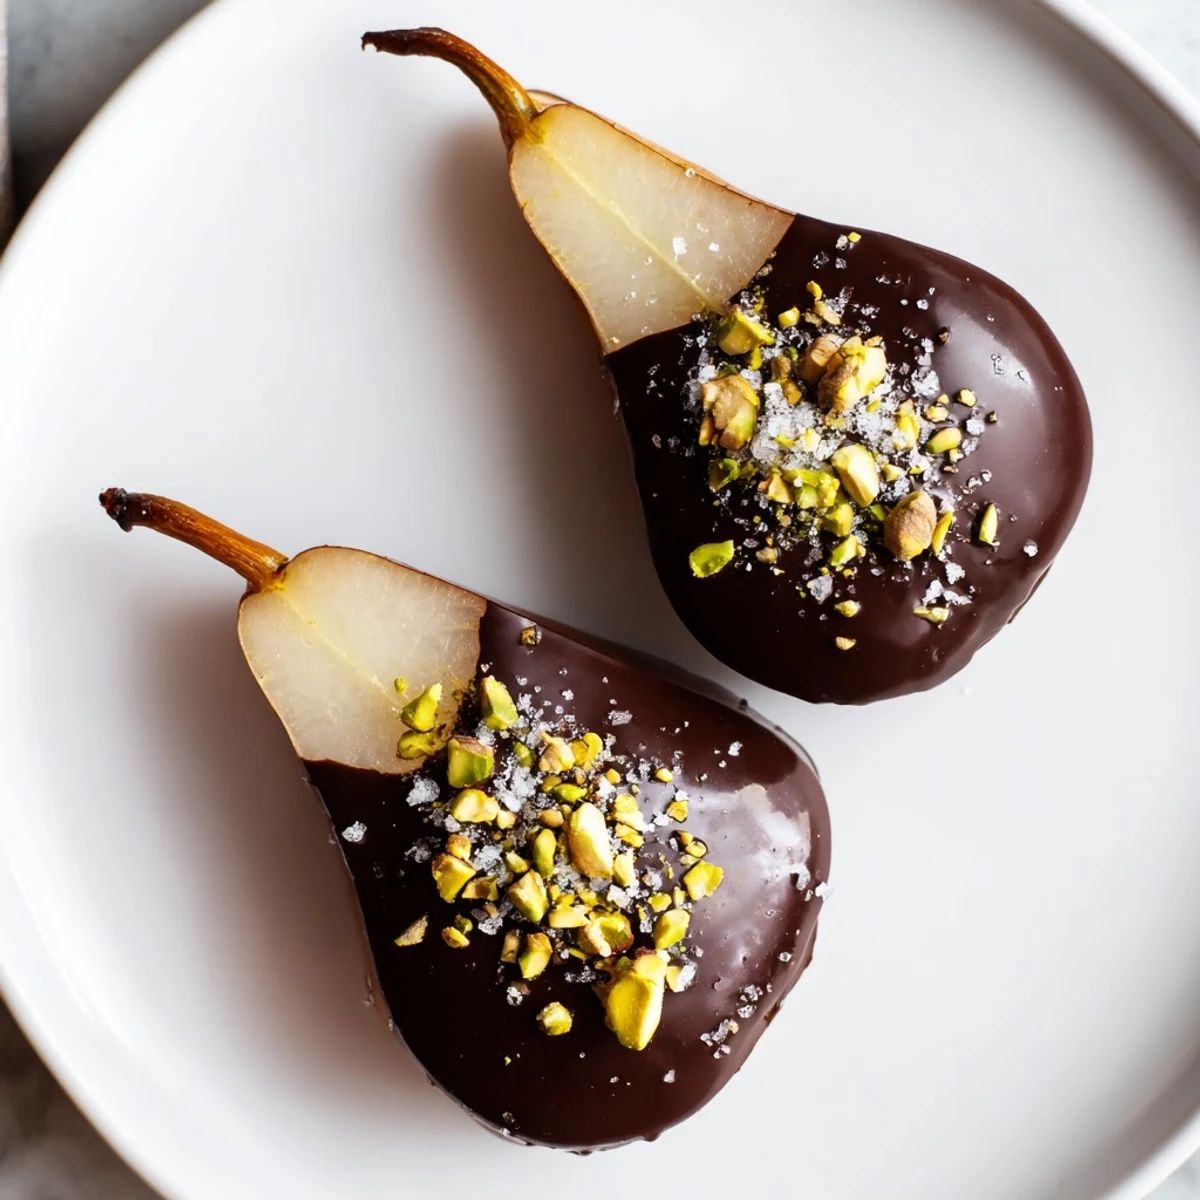
Save Ripe pears are halved and cored, then dipped into melted rich dark chocolate combined with coconut oil or butter for smoothness. After coating, they are chilled until the chocolate sets, creating a glossy and flavorful finish. A sprinkle of flaky sea salt and optional toasted nuts add elegant texture and contrast, balancing sweet fruit with bittersweet chocolate richness. This quick and simple preparation offers a refined treat perfect for any occasion.
The first time I made chocolate covered pears was completely by accident. I had pears that were ripening faster than we could eat them and a bowl of leftover melted chocolate from another project. Something about the sweetness of the pear against that bittersweet chocolate made everyone fall silent. Now they request them for every dinner party.
Last autumn I made these for my book club meeting. One friend kept asking what restaurant I bought them from and refused to believe Id made them myself. Seeing someone go back for seconds and thirds of something so simple really reminds me why I love cooking. The sea salt on top was actually her suggestion after she tried the first batch.
Ingredients
- 3 ripe but firm pears: The firmness is crucial here because soft pears will fall apart when you try to dip them
- 200 g dark chocolate: I always use at least 70 percent cocoa because the bitterness balances beautifully with the pears natural sweetness
- 1 tbsp coconut oil or unsalted butter: This thins the chocolate just enough so it coats smoothly without being too thick to bite through
- 2 tbsp chopped toasted nuts: The crunch against the creamy chocolate and soft pear is absolutely essential for texture
- Flaky sea salt: Just a pinch makes the chocolate flavor pop and keeps each bite interesting
Instructions
- Prep your workspace:
- Line a baking sheet with parchment paper before you start melting anything. Trust me you will thank yourself later when the chocolate sets and peels right off instead of sticking to the pan.
- Get the pears ready:
- Wash and dry each pear thoroughly then cut them in half lengthwise and scoop out the core. Any water left on the surface will make the chocolate seize up so be extra thorough with the drying.
- Melt the chocolate:
- Set a heatproof bowl over simmering water making sure the bottom does not touch the water. Stir the chocolate and coconut oil constantly until completely smooth then remove from heat immediately.
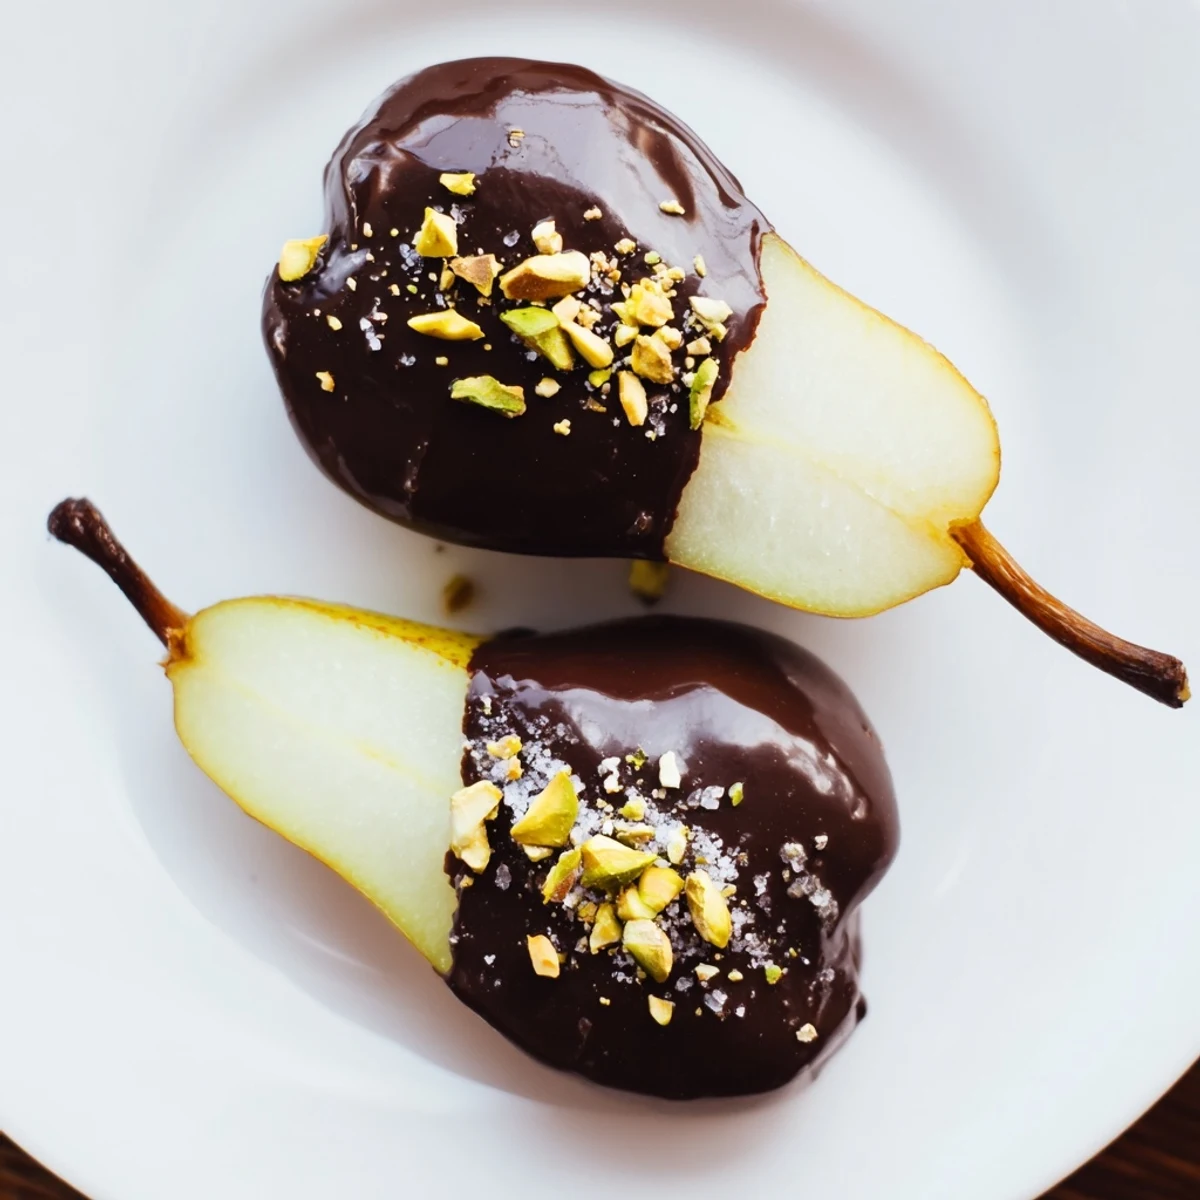
- Dip and coat:
- Hold each pear half by the stem or carefully with a fork and dip the cut side into the chocolate. Let the excess drip off for a moment so you do not end up with a puddle underneath.
- Add the finishing touches:
- Place each pear chocolate side up on your prepared baking sheet and sprinkle with nuts and sea salt right away. The toppings will not stick once the chocolate starts to set.
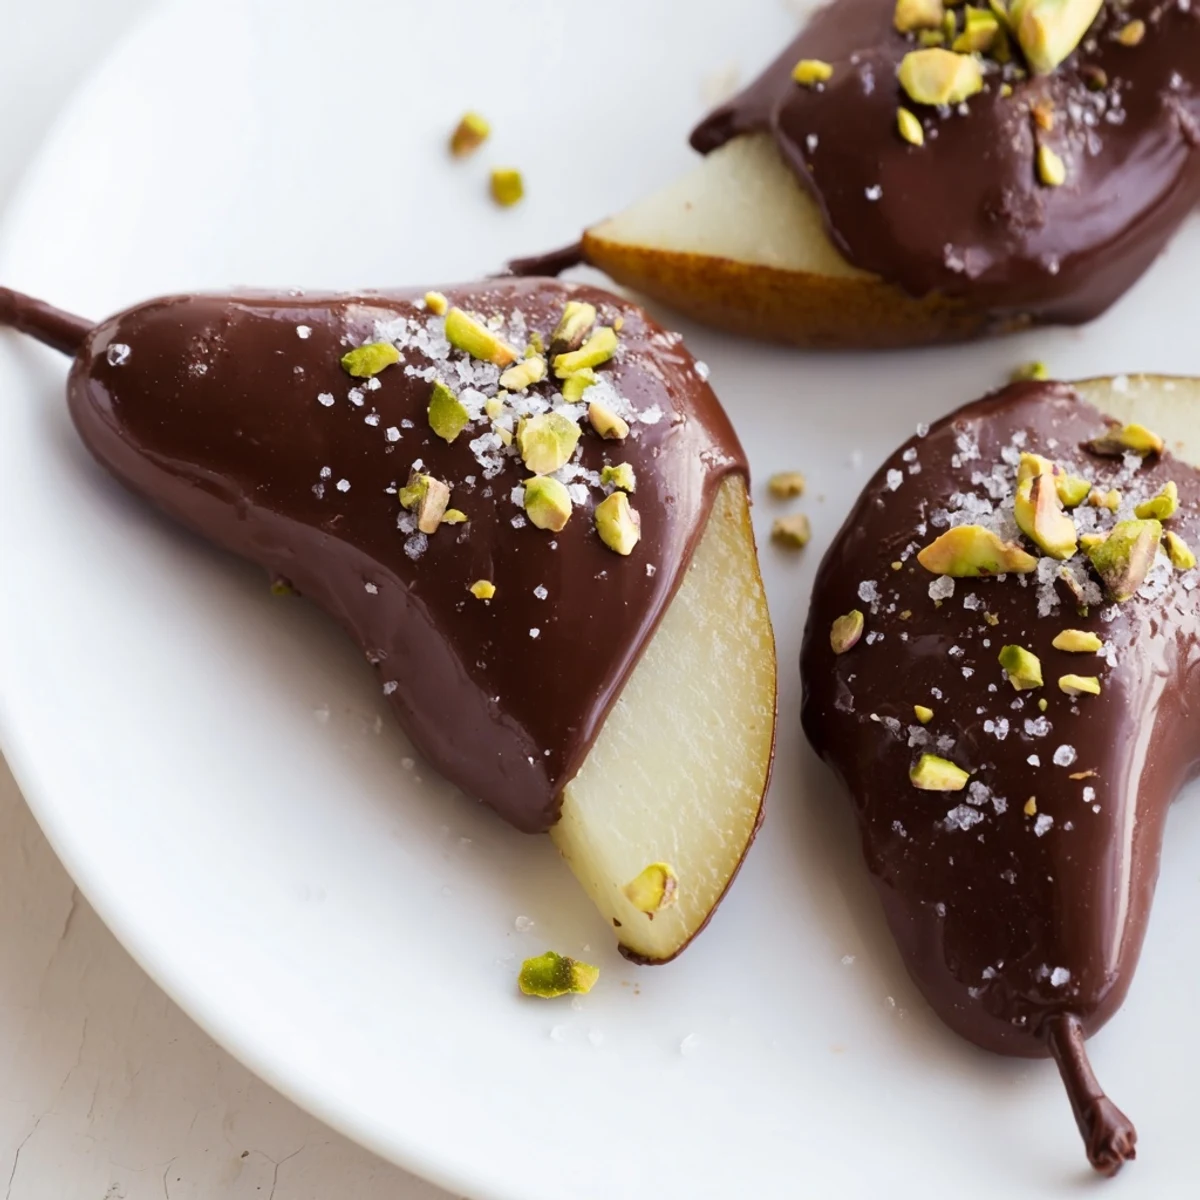
- Let them set:
- Refrigerate for at least thirty minutes until the chocolate is completely firm. They are lovely chilled but also fantastic at room temperature if you are serving them right away.
 Save
Save My niece helped me make these last Christmas and now she calls them her fancy pears. She was so proud dipping each one and choosing exactly where each sprinkle of sea salt would go. That is the thing about simple recipes they leave room for little hands to help and for memories to happen in the kitchen.
Choosing The Right Pears
Through trial and error I have found that Bosc or Anjou varieties work best for this recipe. They hold their shape beautifully and have a nice firm texture even when fully ripe. The trick is gently pressing near the stem it should give slightly but still feel firm.
Getting The Chocolate Right
Temperature matters more than you might think when melting chocolate. Keep the water at a gentle simmer never a rolling boil and stir constantly. I also chop my chocolate into fairly small pieces beforehand so it melts evenly and I do not have to keep the bowl over the heat too long.
Making Them Your Own
Once you have the basic technique down these pears are incredibly forgiving. I have swapped in white chocolate for a stunning contrast drizzled over the dark. Sometimes I add crushed freeze dried raspberries for tartness or even a tiny pinch of cayenne pepper for warmth.
- Try drizzling melted white chocolate in lines over the dark chocolate for a professional looking finish
- Crushed graham crackers add a lovely buttery crunch that reminds me of chocolate covered cheesecake
- A tiny sprinkle of cinnamon over the wet chocolate gives them a cozy warmth that is perfect for fall
 Save
Save These chocolate covered pears have become my go to dessert when I want something impressive but not fussy. There is something about that first bite the snap of chocolate the juiciness of the pear that feels like a tiny celebration.
Common Recipe Questions
- → What type of pears work best?
-
Firm but ripe pears hold shape well and provide juicy sweetness that pairs perfectly with dark chocolate.
- → How do I melt the chocolate smoothly?
-
Use a double boiler to gently melt dark chocolate with coconut oil or butter, stirring until smooth and glossy.
- → Can I add toppings to the pears?
-
Yes, sprinkling toasted nuts like pistachios or almonds and flaky sea salt enhances flavor and texture.
- → What’s the best way to chill the coated pears?
-
Place dipped pears cut side up on parchment-lined baking sheets and refrigerate for at least 30 minutes until set.
- → Are there variations to this preparation?
-
Try drizzling white chocolate or dusting with freeze-dried raspberries for added flavor complexity.
