 Save
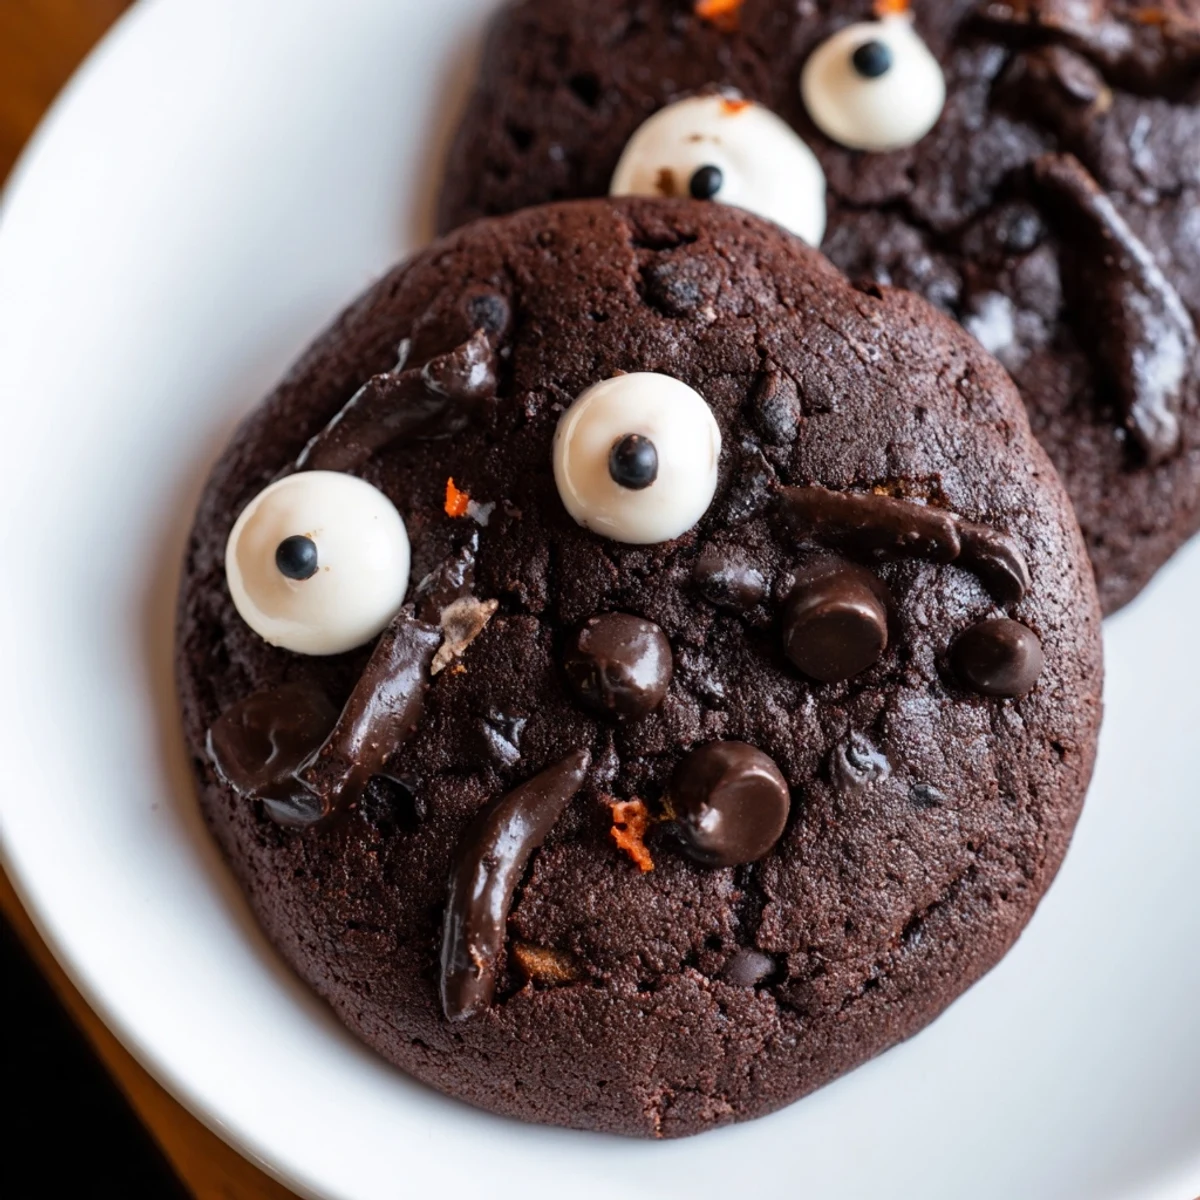
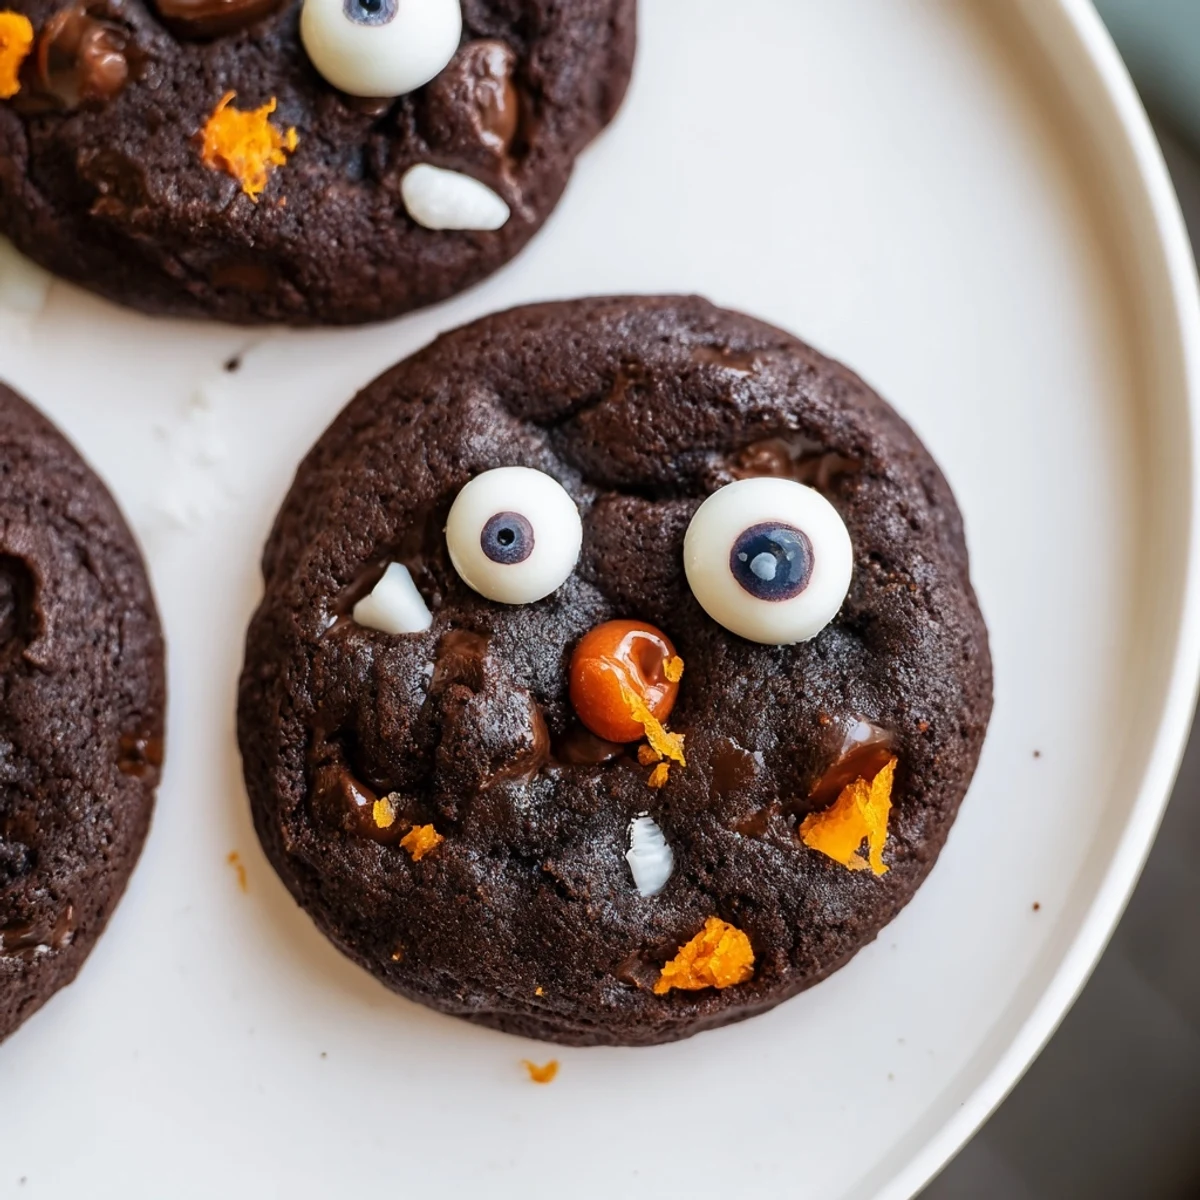
Save These delightfully spooky Chocolate Orange Freaky Face Cookies combine rich cocoa with bright citrus notes, creating a treat that's as delicious as it is fun to make. The dough comes together quickly with softened butter, both granulated and brown sugars for chewiness, plus fresh orange zest and juice for that signature chocolate-orange pairing. After baking until the edges are set but centers remain soft, the real magic begins—decorating with candy eyeballs, sprinkles, and melted chocolate transforms each cookie into a unique character.
Perfect for Halloween parties, classroom celebrations, or weekend baking with children, these cookies balance sophisticated flavor with playful presentation. The chocolate-orange combination appeals to adults while the creative decorating aspect captivates kids. Make them your own with different expressions, colors, and decorative elements for a memorable seasonal treat that disappears as quickly as you can make them.
Last Halloween, my kitchen looked like a chocolate explosion had taken up residence. Flour dusted every surface, and my daughter was meticulously arranging candy eyeballs on cookie dough faces while orange zest perfumed the air. Those cookies disappeared faster than I could plate them, with neighbors actually knocking on the door asking if the "bakery" was open again. Now it is not October without a batch of these spooky little faces gracing my counter.
I brought a platter to my office potluck last year, fully expecting adults to be polite but unimpressed with the goofy faces. Instead, my coworker Mark texted me at 9 pm that night begging for the recipe because his teenager had declared them the best cookies ever. Something about that bright citrus cutting through rich chocolate makes people stop midconversation and ask what is in these.
Ingredients
- All-purpose flour: The structure that holds everything together, do not pack it down or your cookies will be dense
- Unsweetened cocoa powder: Use a good quality brand here since it is the main flavor driver
- Baking soda: Gives the cookies just enough lift to stay chewy rather than flat
- Salt: Crucial for balancing the sweet chocolate and bright orange
- Unsalted butter: Soften it properly but do not let it get greasy or warm
- Granulated sugar: Creates crisp edges while the centers stay soft
- Light brown sugar: Adds moisture and that irresistible chewy texture
- Eggs: Room temperature eggs incorporate better and help the dough hold its shape
- Vanilla extract: Do not skip this even with the orange, it anchors all the flavors
- Orange zest: Use a microplane and avoid the bitter white pith completely
- Fresh orange juice: Just enough to enhance the zest without making the dough too wet
- Semisweet chocolate chips: Semi sweet balances the cocoa better than milk chocolate would
- Candy eyeballs: The scarier and goofier the better, let kids pick their favorites
Instructions
- Get your oven ready:
- Preheat to 350°F and line two baking sheets with parchment paper, this prevents sticking and makes cleanup effortless
- Mix the dry team:
- Whisk together flour, cocoa powder, baking soda, and salt in a medium bowl until everything is evenly distributed
- Cream the butter and sugars:
- Beat the butter, granulated sugar, and brown sugar until the mixture looks pale and fluffy, this usually takes about 2 to 3 minutes
- Add the wet ingredients:
- Beat in eggs one at a time, then add vanilla, orange zest, and orange juice, mixing until the batter looks smooth and glossy
- Combine everything:
- Gradually mix in the dry ingredients just until you no longer see flour streaks, overmixing makes tough cookies
- Fold in the chocolate:
- Gently stir in the chocolate chips by hand so they do not break apart from the mixer
- Scoop the dough:
- Drop tablespoon sized balls onto the baking sheets, leaving about 2 inches of space between each one
- Bake to spooky perfection:
- Bake for 10 to 12 minutes until the edges look firm but the centers still feel slightly soft when you gently press them
- Cool completely:
- Let them sit on the baking sheets for 5 minutes before moving them to wire racks, warm cookies will smudge your decorations
- Create your freaky faces:
- Once cool, let everyone decorate with candy eyeballs, sprinkles, or icing to make each cookie uniquely spooky
 Save
Save My niece usually claims she hates anything with fruit in desserts, but she ate three of these before realizing they had orange in them. The way her eyes lit up when I pointed out the zest in the dough was priceless, and now she requests these specifically for her birthday instead of cake.
Making The Orange Flavor Pop
I have learned that fresh orange zest makes a bigger difference than I ever expected. The oils in the zest carry way more flavor than the juice alone, so take your time grating and really press that zester against the fruit to get every last bit of aromatic oil into your dough.
Decorating With Kids
Set up a decorating station with small bowls of different toppings and let everyone go wild. Some of the weirdest faces my kids have created have become family legends, and the memories they make while getting chocolate everywhere are worth the extra cleanup time.
Storage And Make Ahead Tips
The dough freezes beautifully for up to three months if you scoop it into balls first, then you can bake fresh cookies whenever the mood strikes. Already baked cookies stay fresh for four days in an airtight container, though they rarely last that long in my house.
- Decorate only after cookies have cooled completely or your icing will slide right off
- Let kids use toothpicks to position tiny sprinkles exactly where they want them
- Melted chocolate works better than icing for fine details like eyebrows or scars
 Save
Save There is something magical about watching a kitchen full of people carefully designing cookie faces while arguing over whose looks the spookiest. These cookies have become the way my family officially kicks off the Halloween season, and I would not have it any other way.
Common Recipe Questions
- → What makes the chocolate-orange combination work so well?
-
The bright, citrusy notes from fresh orange zest and juice cut through the rich darkness of cocoa powder and chocolate chips, creating a balanced flavor profile. The acidity of orange enhances chocolate's depth while adding refreshing contrast that prevents these cookies from feeling too heavy or overly sweet.
- → Can I make the dough ahead of time?
-
Absolutely. Scoop the dough into balls and refrigerate for up to 3 days or freeze for up to 3 months. When ready to bake, add 1-2 minutes to the baking time if baking from frozen. Chilled dough actually produces thicker cookies with better texture, so making it ahead can improve results.
- → What if I don't have candy eyeballs for decorating?
-
Get creative! Use white chocolate chips with dark chocolate dots, pipe melted white and dark chocolate, or use colorful sprinkles arranged into faces. Mini marshmallows work well for eyes, while pretzel sticks can make fun expressions. The goal is creativity, not perfection—let kids design their own spooky characters.
- → Why should I cool cookies on the baking sheet first?
-
Letting cookies rest on the hot baking sheet for 5 minutes allows them to finish setting and become easier to handle. During this time, carryover cooking completes the centers while the structure stabilizes. Moving them too soon causes breakage, but waiting too long makes them stick to the parchment.
- → How can I tell when the cookies are done baking?
-
Look for edges that appear set and slightly firm while the centers still look soft and underbaked. The tops should lose their raw shine but won't look completely dry. Remember, cookies continue cooking on the hot baking sheet after leaving the oven, so removing them when slightly underdone yields perfectly chewy results.
- → Can I substitute butter with oil or margarine?
-
Butter provides essential flavor and texture that oils and margarine can't replicate. Oil creates greasy cookies, while margarine affects spread and texture. For best results, stick with unsalted butter. If dairy-free is necessary, try coconut oil softened to room temperature, though the flavor profile will change slightly.
- → What's the best way to store these decorated cookies?
-
Once fully decorated and cooled, store in an airtight container at room temperature for up to 4 days. Place parchment paper between layers to prevent decorations from smudging. Avoid refrigeration unless your kitchen is very warm, as moisture from the fridge can make the cocoa flavor dull and decorations weep or dissolve.
