 Save
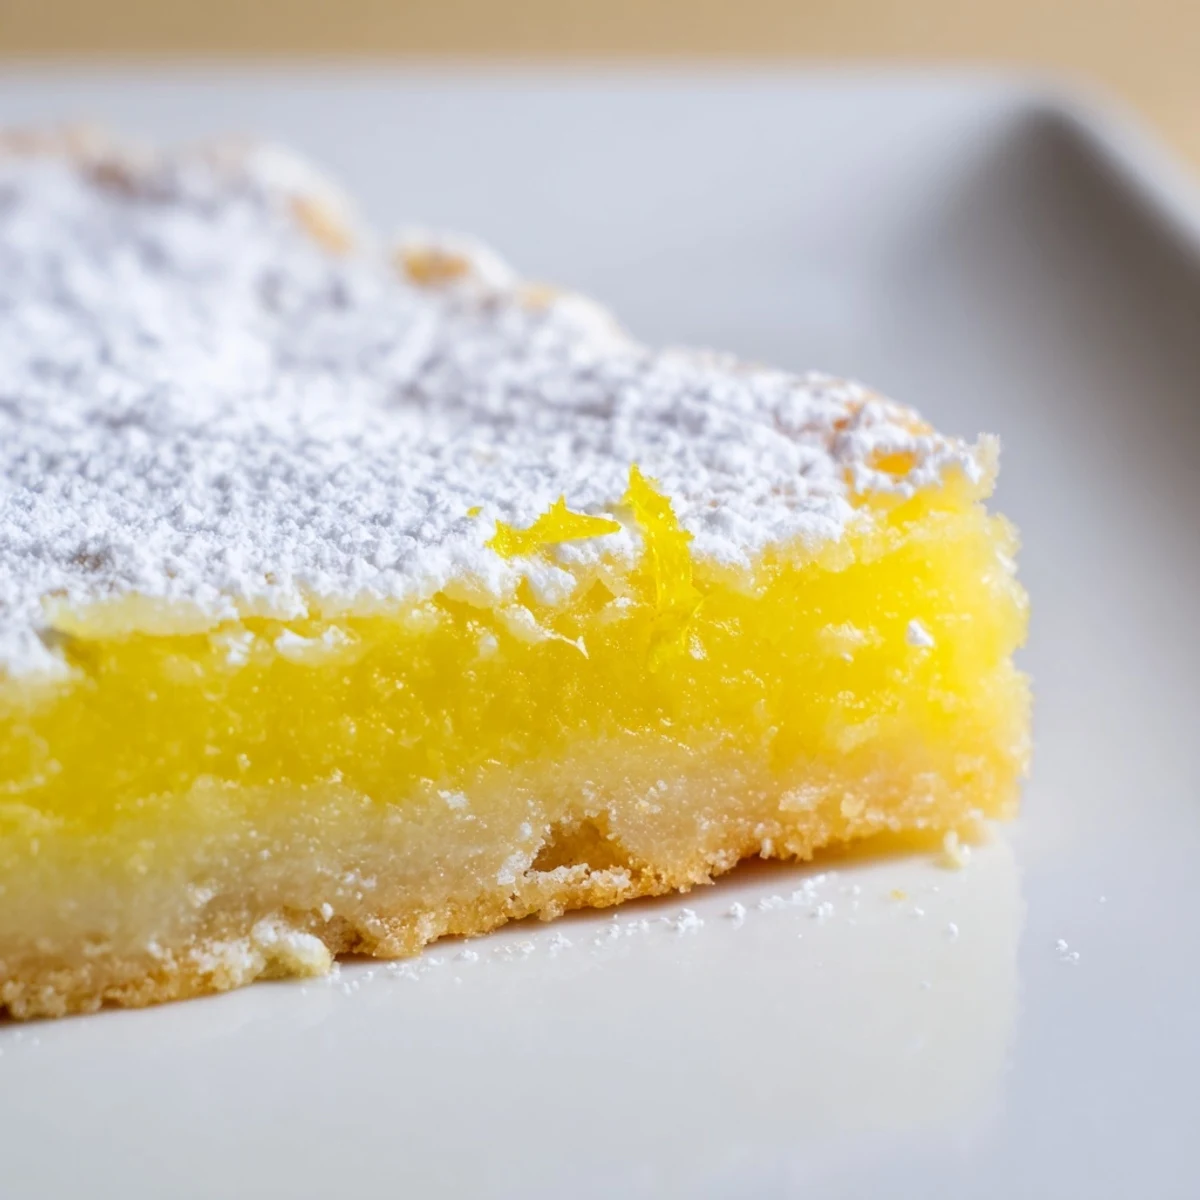
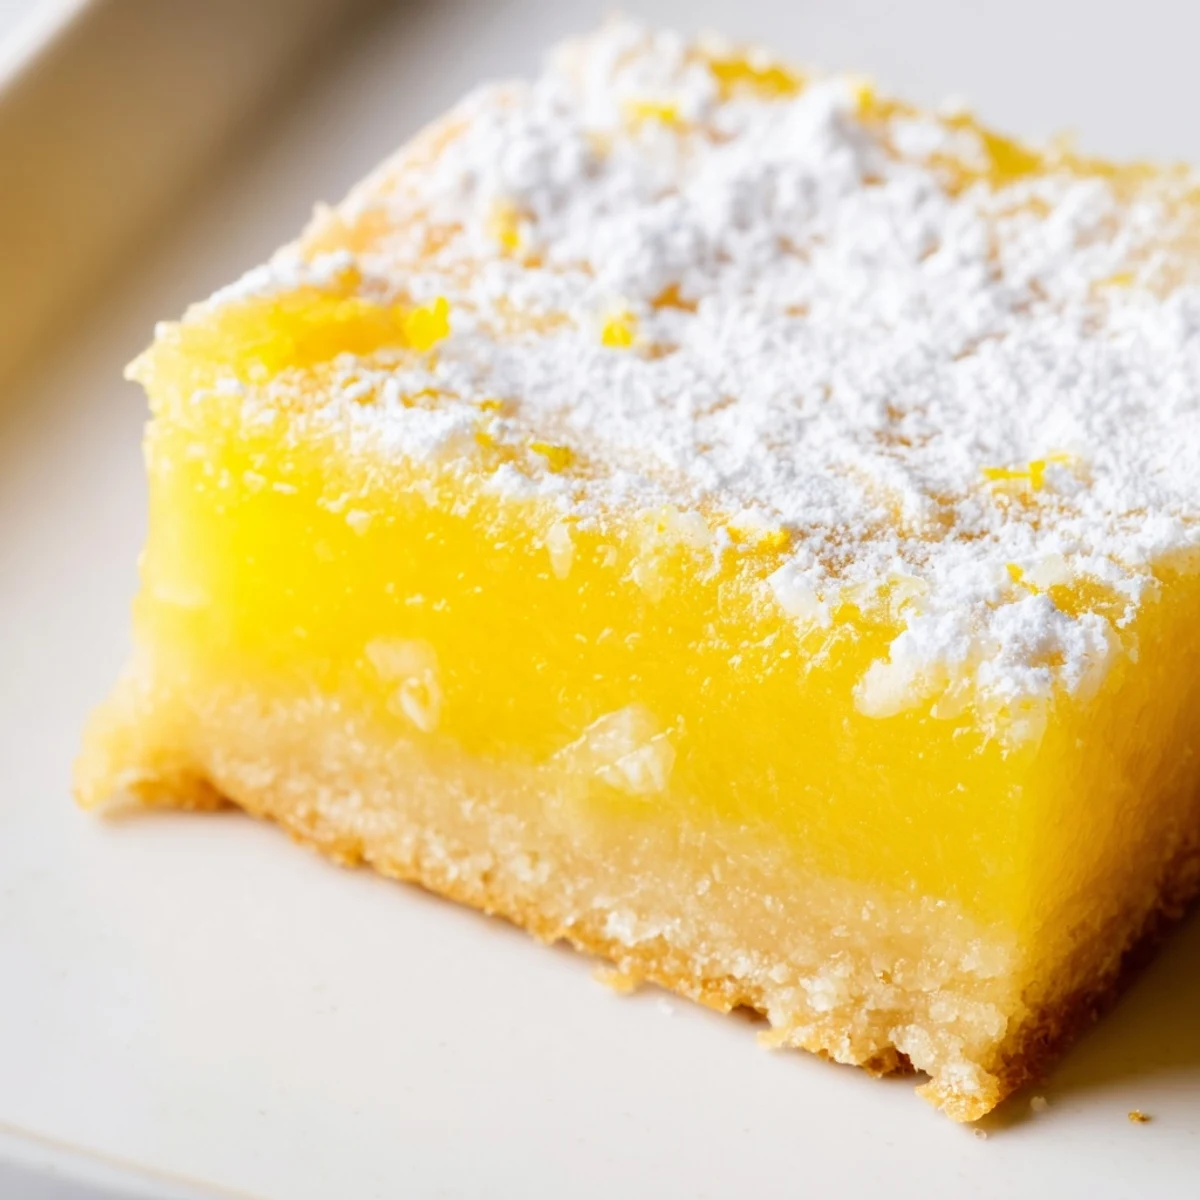
Save These classic lemon bars combine a rich, buttery shortbread base with a vibrant, tangy-sweet lemon curd filling. The contrast between the crisp, melt-in-your-mouth crust and the silky smooth citrus center creates the perfect balance of flavors and textures.
Ready in just over 2 hours with only 15 minutes of active preparation, this American dessert yields 16 generous bars. The finished treats are finished with a dusting of powdered sugar for an elegant presentation that's ideal for gatherings, potlucks, or afternoon tea.
For the best results, use freshly squeezed lemon juice and zest to achieve that bright, natural citrus flavor. The bars can be made ahead and chilled overnight for even cleaner slicing.
My grandmother kept a ceramic lemon tree on her windowsill that I thought was magical until I was twelve. When she finally let me help her make these bright sunshine squares, she told me the secret was pressing the crust with warm hands and never rushing the zesting. Now every time I zest lemons, that citrus spray hits the air and I am back in her tiny kitchen, learning that patience makes the best desserts.
Last summer I made three batches for a wedding shower, forgetting that my apartment has zero air conditioning. Everything felt sticky and frantic until the first person took a bite and went completely silent. The hostess hugged me with flour on her shirt, asking how I got the filling so perfectly set.
Ingredients
- 1 cup (225 g) unsalted butter: Room temperature butter creates the most tender shortbread base I have found
- 1/2 cup (100 g) granulated sugar: Just enough sweetness to let the butter shine without overwhelming
- 2 cups (250 g) all-purpose flour: Gives the crust structure while staying melt-in-your-mouth tender
- 1/4 tsp salt: A tiny pinch that makes all the flavors pop
- 1 and 1/2 cups (300 g) granulated sugar: Balances the intense lemon acidity beautifully
- 1/4 cup (30 g) all-purpose flour: Helps set the filling without making it chalky or dense
- 4 large eggs: Room temperature eggs incorporate better and create that silky texture
- 2/3 cup (160 ml) freshly squeezed lemon juice: Fresh juice makes a huge difference over bottled stuff
- 1 tbsp lemon zest: Where all that bright lemon essence lives
- Powdered sugar: The final dusting that makes these look bakery-perfect
Instructions
- Preheat your oven and prepare the pan:
- Set your oven to 350°F (175°C) and line a 9x13 inch baking pan with parchment paper, letting some hang over the sides like little handles.
- Make the shortbread crust:
- Cream the softened butter and 1/2 cup sugar until fluffy, then mix in the flour and salt just until dough forms.
- Press and bake the crust:
- Press the dough evenly into your prepared pan and bake for 18-20 minutes until lightly golden.
- Prepare the lemon filling:
- While the crust bakes, whisk together 1 and 1/2 cups sugar and 1/4 cup flour, then add eggs, lemon juice, and zest until smooth.
- Add the filling and bake again:
- Pour the lemon mixture over the hot crust immediately and return to the oven for 18-20 minutes until just set in the center.
- Cool completely before slicing:
- Let the bars cool completely in the pan, then lift them out using the parchment overhang and cut into 16 squares.
- Dust and serve:
- Generously dust with powdered sugar right before serving for that snowy finish.
 Save
Save My sister-in-law asked for the recipe after Christmas dinner last year, then texted me at midnight saying she ate three bars standing at the counter. Sometimes food is just that good.
Making The Perfect Crust
I learned the hard way that overmixing the shortbread dough makes it tough instead of tender. Now I mix just until flour disappears and press the dough into the pan with warm hands, using the heel of my palm to create an even layer.
Getting That Silky Filling
The trick to a smooth filling is whisking the sugar and flour together first before adding the wet ingredients. This prevents lumps and ensures every bite has that consistent creamy texture that makes lemon bars so irresistible.
Serving And Storage
These bars actually improve after a night in the refrigerator, as the flavors meld together beautifully. I keep them layered between wax paper in an airtight container for up to five days, though they rarely last that long in my house.
- Sprinkle powdered sugar right before serving or it will absorb into the surface
- A chilled knife dipped in hot water cuts cleaner slices
- Serve slightly chilled for the best texture experience
 Save
Save Hope these bright squares bring as much sunshine to your kitchen as they have to mine over the years.
Common Recipe Questions
- → How many lemons do I need for the filling?
-
You'll need approximately 3-4 medium lemons to yield 2/3 cup (160 ml) of freshly squeezed juice plus 1 tablespoon of zest. Fresh lemons provide the brightest, most natural flavor compared to bottled juice.
- → Can I make lemon bars ahead of time?
-
Yes, lemon bars actually improve after chilling. You can make them up to 2 days in advance and store them in the refrigerator. The cold temperature helps the filling set completely, making them easier to slice cleanly. Dust with powdered sugar just before serving.
- → Why did my lemon bars turn out runny?
-
Runny bars usually mean underbaking. The filling should be just set in the center—it may still jiggle slightly, but it shouldn't be liquid. Also, ensure you measure flour accurately, as too little affects the filling's thickening ability.
- → What's the best way to get clean slices?
-
Chill the bars completely in the refrigerator for at least 2 hours before cutting. Use a sharp knife and wipe it clean between slices. For extra precision, you can briefly run the knife under hot water and dry it before each cut.
- → Can I use Meyer lemons instead of regular ones?
-
Absolutely. Meyer lemons are sweeter and less acidic than regular lemons, resulting in a more delicate, floral flavor. If you use Meyers, you may want to reduce the sugar slightly to maintain the perfect sweet-tart balance.
- → How should I store leftover lemon bars?
-
Store them in an airtight container in the refrigerator for up to 5 days. Place parchment paper between layers to prevent sticking. For longer storage, wrap individual bars tightly and freeze for up to 3 months.
