 Save
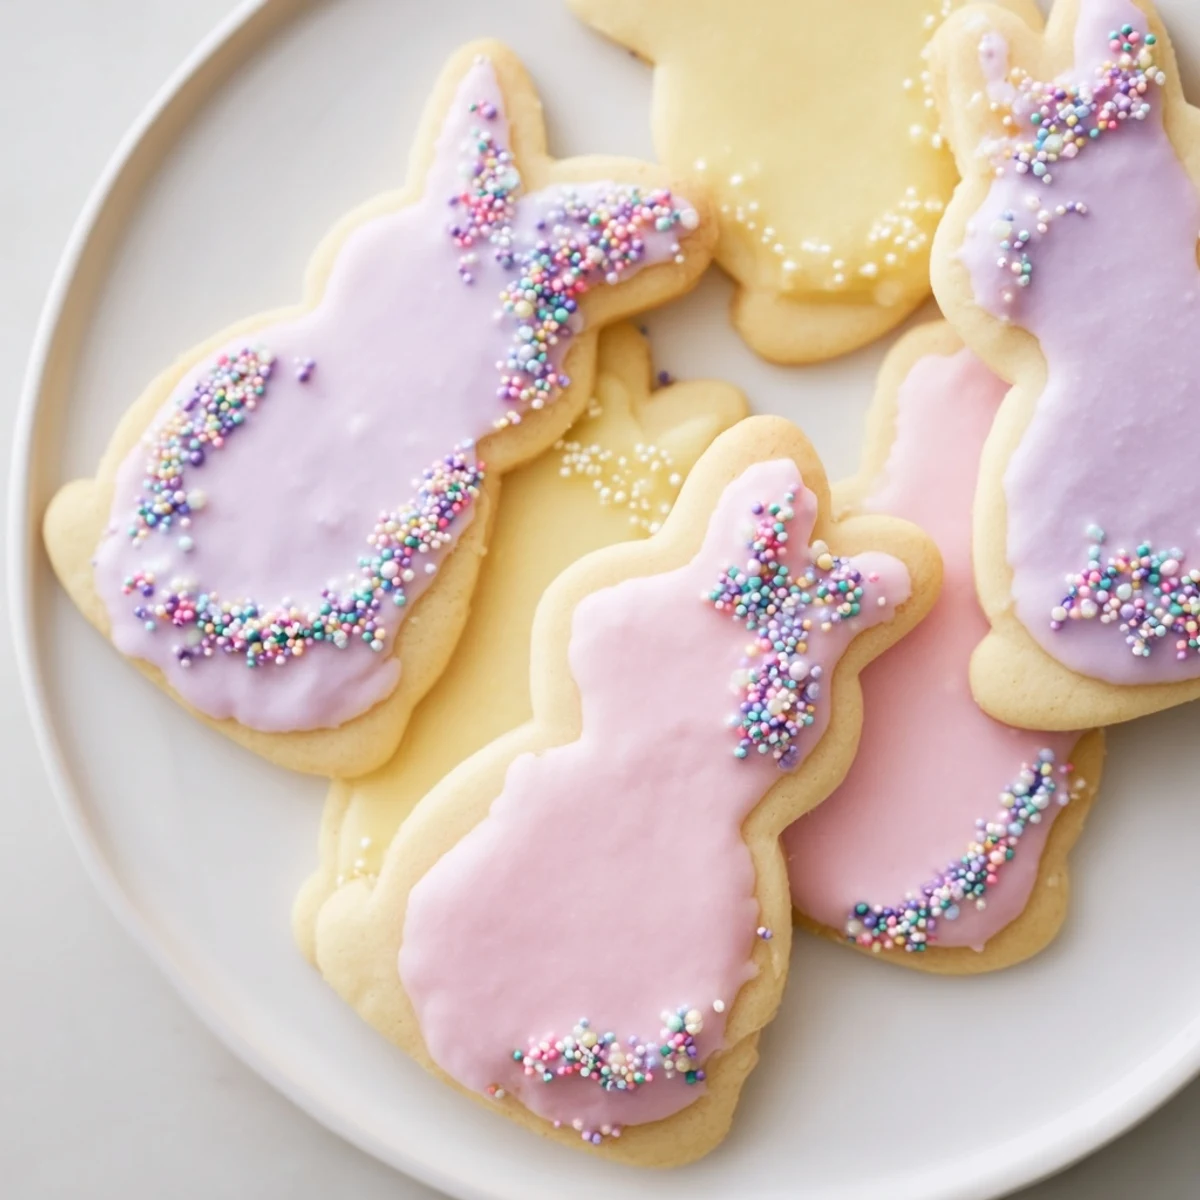
Save These sugar cookies feature a tender, buttery base enhanced with vanilla and optional almond notes. After chilling, the dough is rolled and cut into charming bunny shapes perfect for spring. The highlight is a crisp royal icing, made from powdered sugar and egg whites or meringue powder, which is colored in pastel hues to decorate each piece. Baking at moderate heat yields lightly golden edges. Chill the cut shapes for a crisper texture. Decorating includes piping and optional sprinkles or pearls. Stored airtight, they keep for a week.
The first Easter I made these with my niece, she insisted every bunny needed pink ears because that is what bunnies wear to Easter parties. I wasnt going to argue with that logic. We ended up with an entire battalion of pink-eared soldiers lined up on the counter, waiting for their icing uniforms. Now I cant make them without thinking of her serious little face explaining proper bunny fashion to me.
Last spring I made three batches for a neighborhood gathering and learned something important. Adults get just as excited about decorating cookies as kids do. My neighbor Gary spent twenty minutes perfecting a tiny bow tie on his bunny and looked genuinely proud of his work. Theres something about piping icing that brings out the artist in everyone, regardless of age.
Ingredients
- 2 1/2 cups all-purpose flour: Sift it first, seriously, I learned the hard way that lumpy flour makes for tough cookies
- 1/2 teaspoon baking powder: Just enough lift to make them tender without losing their crisp edges
- 1/4 teaspoon salt: Balances the sweetness and wakes up all the flavors
- 3/4 cup unsalted butter softened: Room temperature is non negotiable here, cold butter creates sad flat cookies
- 1 cup granulated sugar: Cream this thoroughly with the butter, those air pockets are what make cookies tender
- 1 large egg: Bring it to room temperature too so it incorporates evenly
- 2 teaspoons pure vanilla extract: Do not skip this, do not use imitation, your cookies deserve better
- 1/2 teaspoon almond extract: Completely optional but adds this lovelybakery flavor people cant quite identify
- 3 cups powdered sugar sifted: Sifting royal icing ingredients is mandatory, nobody wants lumpy bunnies
- 2 large egg whites: Pasteurized if you are nervous about raw eggs, or use meringue powder
- 4 to 5 tablespoons water: Start with less, you can always add more but you cannot take it back
- Gel food coloring: Gel gives you those gorgeous pastels without thinning your icing like liquid does
Instructions
- Whisk the dry trio together:
- In a medium bowl, combine flour, baking powder, and salt until well blended. Set this aside while you work on the butter.
- Cream butter and sugar until fluffy:
- Beat on medium speed for 2 to 3 minutes until the mixture looks pale and airy. This step is worth every second.
- Add the egg and extracts:
- Beat until everything is fully combined and the mixture looks smooth and glossy.
- Mix in the flour gradually:
- Add the dry ingredients in portions, mixing just until a dough forms. Do not overwork it or your cookies will be tough.
- Chill the dough:
- Divide in half, flatten into discs, wrap tightly, and refrigerate for at least 1 hour. Warm dough spreads too much.
- Preheat and prepare:
- Heat oven to 350 degrees and line baking sheets with parchment paper.
- Roll and cut:
- Roll one disc at a time to 1/4 inch thickness on a floured surface. Cut bunny shapes and transfer to prepared sheets.
- Bake until barely golden:
- Bake for 9 to 11 minutes until edges just start to color. Cool on sheets for 5 minutes before moving to a wire rack.
- Make the royal icing:
- Beat powdered sugar and egg whites on low until combined, then high for 5 minutes until stiff peaks form. Thin with water if needed.
- Color and decorate:
- Divide icing into bowls and tint with gel coloring. Pipe or spread onto cooled cookies and add sprinkles before setting.
- Let them set completely:
- Allow decorated cookies to dry for 2 to 4 hours until icing is hard to the touch.
 Save
Save My sister usually claims she is terrible at anything artistic but spent an entire afternoon creating tiny polka dotted bunnies that looked professionally done. She texted me pictures for days and made me promise to save her some dough next time. Sometimes the simplest cookies become the most meaningful projects.
Making Your Icing Work
The consistency of royal icing is everything and nobody explains this well enough. For outlining and details, you want it thick like toothpaste, it should hold its shape when piped. For flooding larger areas, thin it with water until it flows back into itself within 10 seconds. I keep separate bowls and add water literally one drop at a time, testing constantly. Once I made an entire batch too thin and ended up with puddle bunnies that looked like they melted in the sun. Lesson learned.
Getting Creative with Colors
Gel food coloring is absolutely worth the extra cost compared to liquid drops. The colors are more vibrant and you do not have to use much to get that perfect pastel Easter palette. Start with a toothpick amount of gel, you can always add more but you cannot undo an overly dark color. I made the mistake once of going too heavy on the pink and ended up with what my nephew called hot rod bunnies instead of sweet spring treats.
Storage and Make Ahead Tips
The dough freezes beautifully for up to three months, which means you can make it weeks before Easter and just thaw and bake when you are ready. Once decorated, these cookies actually improve after a day as the icing sets completely and softens slightly against the cookie. Store them layered between parchment paper in an airtight container and they will stay fresh for a week.
- Undecorated baked cookies freeze well for up to a month if sealed tightly
- Royal icing can be made ahead and stored in the refrigerator for up to three days
- Bring refrigerated icing to room temperature and rebeat before using
 Save
Save These cookies have become my go-to for spring gatherings and I hope they bring the same joy to your kitchen as they have to mine. Happy baking and happy Easter.
Common Recipe Questions
- → What gives the cookies their tender texture?
-
The combination of unsalted butter and chilling the dough before baking helps create a tender and flaky crumb.
- → How is the royal icing made crisp and smooth?
-
Beating powdered sugar with egg whites or meringue powder until stiff peaks form creates a smooth, crisp finish once dried.
- → Can almond extract be omitted or substituted?
-
Yes, almond extract is optional and can be replaced with extra vanilla extract to accommodate allergies or preferences.
- → Why chill the dough discs before rolling?
-
Chilling firms the dough, making it easier to roll and cut precise shapes without spreading during baking.
- → How long should the decorated cookies dry before storing?
-
Allow royal icing to fully set for 2 to 4 hours to ensure it is firm and ready for storage or serving.
- → What are good alternatives to dairy butter for this dough?
-
Dairy-free butters with similar fat content can be used, though texture and flavor may vary slightly.
