 Save
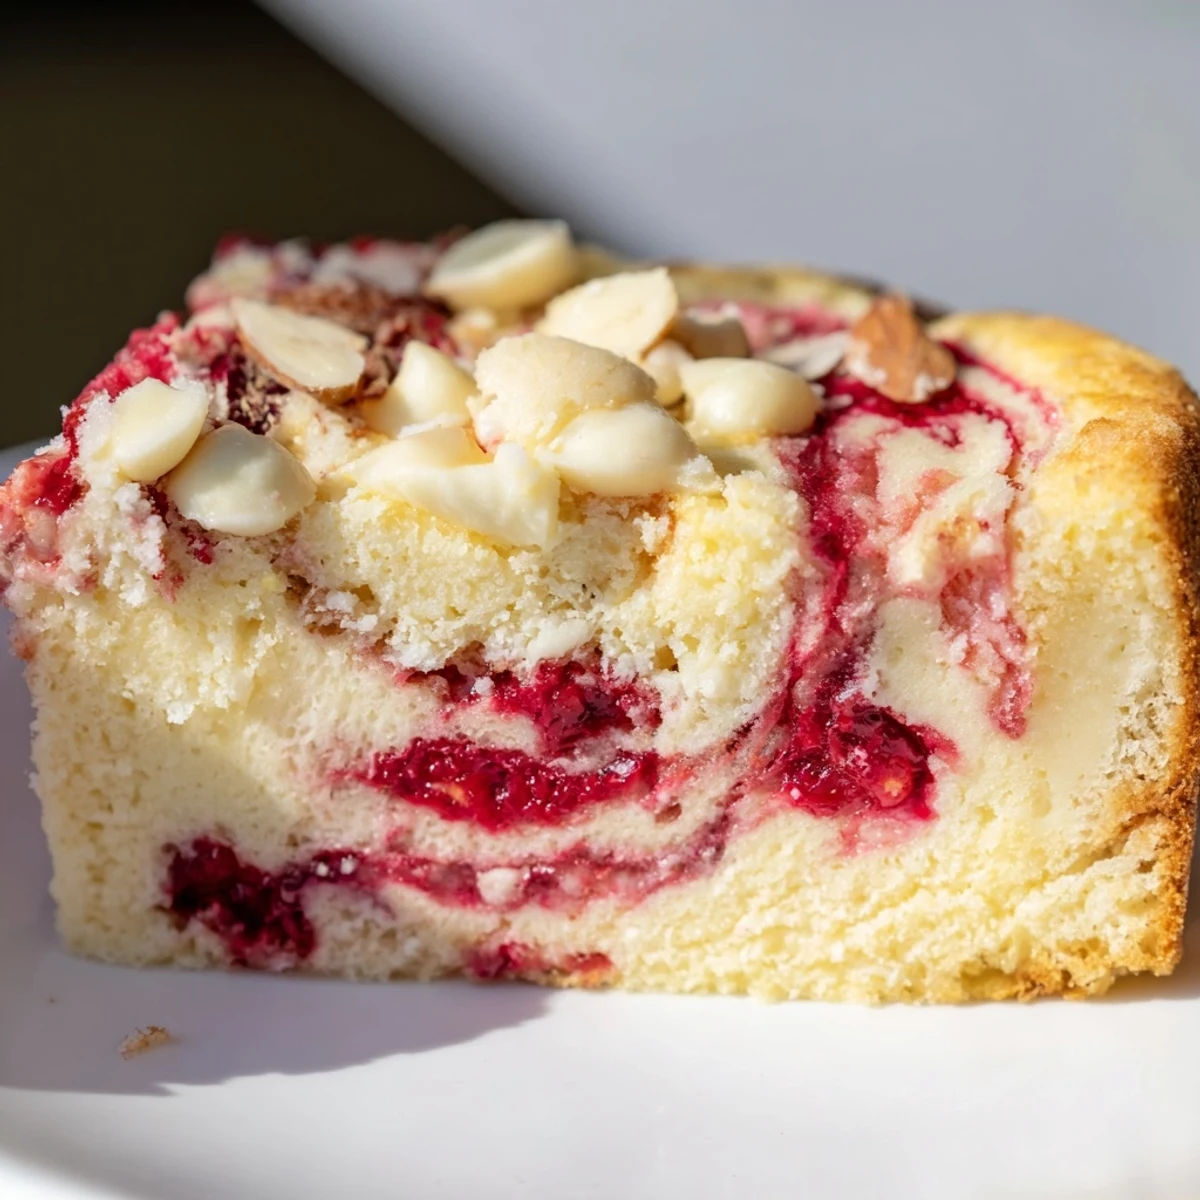
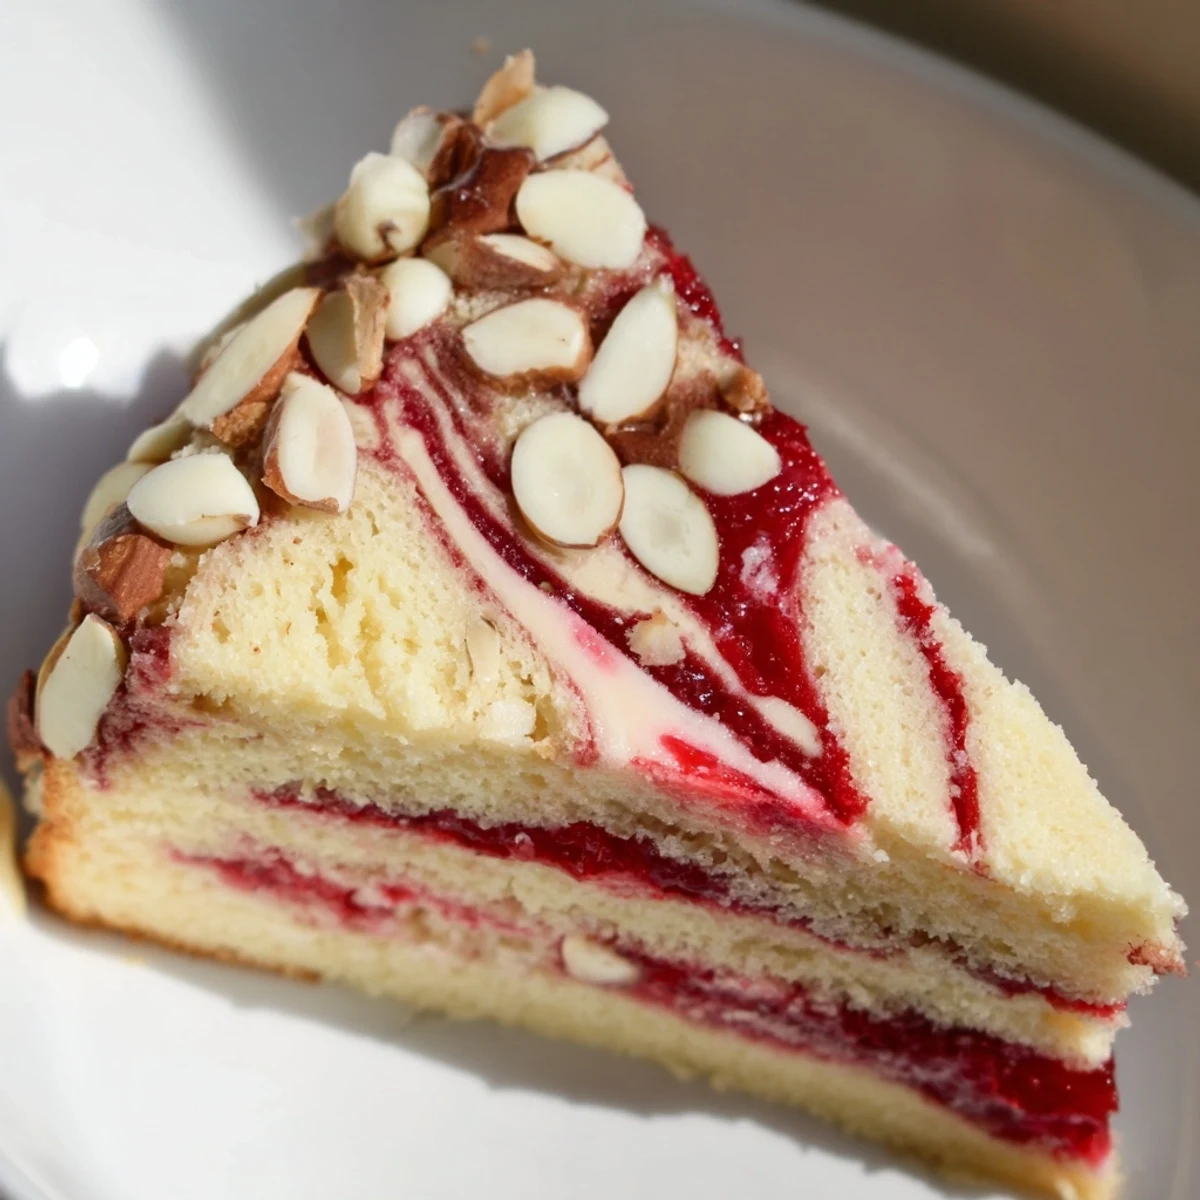
Save This stunning marbled creation combines tender vanilla cake base with rich cheesecake filling and vibrant strawberry swirls. The white chocolate chips and optional sliced almonds create beautiful texture contrast on top while the cake bakes into its signature earthquake appearance.
Perfect for gatherings, this impressive dessert comes together in just over an hour with simple preparation. The marbled pattern creates visual drama while the combination of fruity, creamy, and vanilla flavors delivers crowd-pleasing taste in every bite.
The first time I made this earthquake cake was for a summer potluck when I completely forgot to buy a dessert until two hours before the party. I frantically raided my pantry, threw together what I had, and somehow created this magnificent mess of strawberry and cream cheese that everyone went absolutely wild for. Now it is the most requested thing I make, and honestly, I get why. The way the cheesecake sinks into the vanilla cake while creating those gorgeous cracked crevices filled with strawberry swirl is just pure magic.
Last spring my neighbor Sarah came over just as this was coming out of the oven, and she literally stopped mid sentence to ask what smelled so heavenly. We ended up eating it warm on the back porch while the kids played in the yard, and she told me later that her husband talked about that cake for three days straight. There is something about the combination of white chocolate and strawberries that feels like a warm hug on a plate.
Ingredients
- 1 box vanilla cake mix: This foundation creates the perfect tender crumb that holds up beautifully to the heavy cheesecake layer
- 3 large eggs: Room temperature eggs will blend more smoothly into both batters for better texture
- 1/2 cup vegetable oil: Keeps the cake incredibly moist even after refrigeration
- 1 cup whole milk: The fat content matters here for richness, though I have used 2% in a pinch
- 8 oz cream cheese, softened: Absolutely must be softened to room temp or you will get lumps in your filling
- 1/2 cup unsalted butter, softened: Together with cream cheese this creates that luxurious cheesecake layer
- 2 cups powdered sugar: Sweetens the cream cheese mixture just enough without becoming cloying
- 1 tsp vanilla extract: Use the good stuff here since this flavor shines through
- 1 cup strawberry pie filling: The thick consistency holds its shape better than fresh preserves during baking
- 1 cup fresh strawberries, sliced: These little pockets of fresh fruit make all the difference
- 1/2 cup white chocolate chips: They get all melty and create these amazing puddles throughout the cake
- 1/2 cup sliced almonds: Totally optional but I love the crunch they add to each bite
Instructions
- Get your oven ready:
- Preheat to 350°F and grease a 9x13 inch pan, then line with parchment paper so you can lift the whole thing out later for pretty serving
- Mix the vanilla batter:
- Combine the cake mix, eggs, oil, and milk in a large bowl and beat until completely smooth, then pour this into your prepared pan
- Make the cheesecake filling:
- In a separate bowl, beat the cream cheese and butter until fluffy, then add the powdered sugar and vanilla and keep beating until silky smooth
- Create the marble effect:
- Drop spoonfuls of the cheesecake mixture all over the cake batter, then use a knife to gently swirl them together just once or twice
- Add the strawberry swirl:
- Dollop the strawberry pie filling across the surface and scatter those fresh sliced strawberries around, then give everything one more gentle swirl
- Sprinkle the toppings:
- Scatter the white chocolate chips and almonds evenly over the top, letting some fall into the crevices for extra flavor pockets
- Bake until golden:
- Bake for 45 to 50 minutes until the edges are golden brown and the center is set but still slightly wobbly
- Let it cool slightly:
- Wait at least 20 minutes before slicing, which gives the cheesecake layer time to set up a bit
 Save
Save This cake has become my go to for practically every occasion because it never fails to make people happy. My daughter actually requested it for her birthday instead of a fancy bakery cake, which I think says everything about how special it tastes.
Making It Your Own
While strawberry is my absolute favorite combination, I have experimented with different fruit fillings depending on the season. Raspberry creates this gorgeous pink color throughout, and cherry gives it a deeper, more intense fruit flavor that feels perfect for winter gatherings.
Serving Suggestions
This cake needs to be served slightly warm or at room temperature to really experience all the textures. I like to set it out about thirty minutes before serving and sometimes even give it a quick ten second zap in the microwave if it has been refrigerated.
Storage And Make Ahead Tips
The cake actually tastes even better the next day after the flavors have had time to meld together. You can make it the night before a party and store it covered in the refrigerator, then bring it to room temperature before serving.
- Always cover with plastic wrap or the cake will absorb other refrigerator flavors
- It keeps well for up to four days though the texture is best within two
- You can freeze individual slices wrapped tightly for up to two months
 Save
Save Every time I serve this, someone asks for the recipe, and I love telling them how deceptively simple it is to make. This is the kind of dessert that makes people feel special and loved.
Common Recipe Questions
- → Why is it called earthquake cake?
-
The dramatic marbled appearance creates cracked, uneven surfaces reminiscent of earthquake terrain. As the cheesecake and strawberry swirls bake, they settle into unique patterns that give this dessert its signature look.
- → Can I use fresh strawberries instead of pie filling?
-
Fresh strawberries alone won't create the same ribbons. Combine sliced fresh berries with strawberry preserves or pie filling for both texture and those beautiful swirl patterns that hold their shape during baking.
- → Should this cake be served warm or chilled?
-
This versatile dessert tastes delicious slightly warm or at room temperature. For easier slicing, let cool completely before cutting. Some enthusiasts enjoy it chilled overnight for denser texture.
- → Can I make this ahead of time?
-
Absolutely. Bake up to two days in advance, store covered at room temperature. The flavors meld beautifully overnight. For longer storage, refrigerate up to five days and bring to room temperature before serving.
- → What other fruit variations work well?
-
Raspberry, cherry, or blueberry pie filling create equally stunning results. The tartness of berries balances the sweet cheesecake and vanilla cake layers perfectly while maintaining that dramatic marbled appearance.
- → Why is my center still wobbly after baking?
-
A slight wobble in the center is completely normal due to the cheesecake component. The filling continues setting as it cools. Avoid overbaking, which can make the vanilla cake layer dry and tough.
