 Save
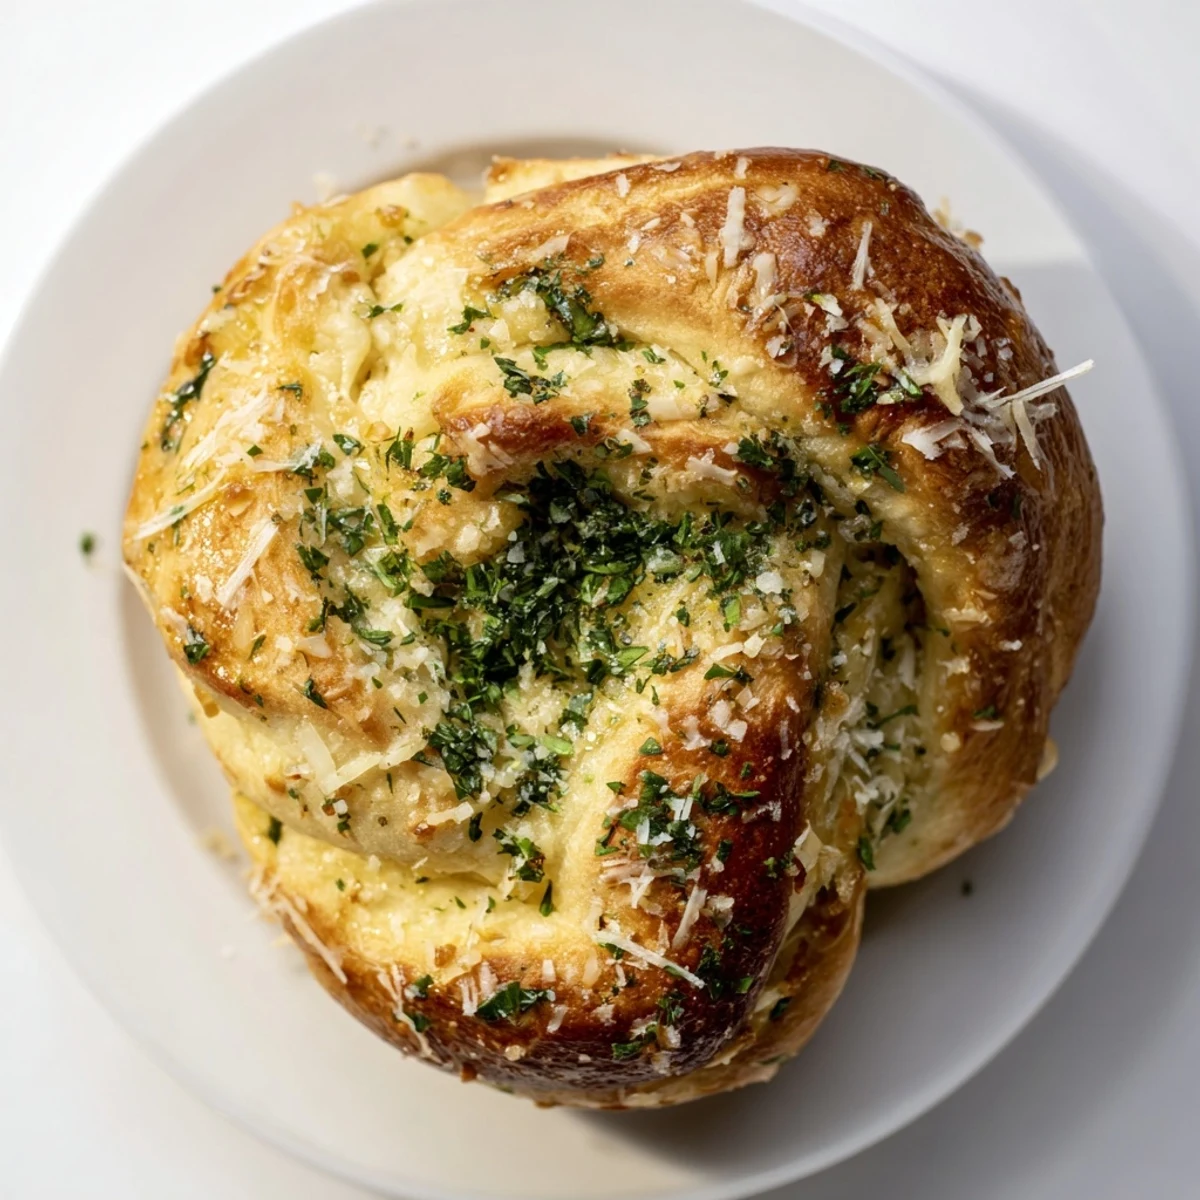
Save These soft knots combine a tender, pillowy texture with a rich garlic butter infusion. Made from a yeast-leavened dough, the knots are brushed generously with a fragrant mix of melted butter, minced garlic, and parsley before baking. The outcome is golden, aromatic bites perfect as a side or snack. The preparation involves letting the dough rise, shaping into knots, resting, and baking until golden, followed by a finishing brush of garlic butter and optional Parmesan sprinkling. Ideal served warm alongside dips or sauces.
I still remember the first time I made garlic knot bread from scratch at home. It was a lazy Sunday afternoon, and my kitchen filled with the warm, yeasty aroma while golden-brown knots emerged from the oven. There's something magical about how simple ingredients—flour, water, yeast, and butter—transform into these pillowy, fragrant morsels that taste like they came straight from an Italian bakery. That first bite, warm and slick with garlic butter, made me understand why these little knots became my go-to comfort food.
I'll never forget hosting dinner for my sister and her family when I first made these. I was nervous about the homemade bread, but when I pulled those golden knots from the oven and brushed them with garlic butter one more time, the smell alone had everyone hovering in the kitchen. My nephew grabbed one before they even cooled, burned his fingers laughing, and declared it the best thing I'd ever made. That moment taught me that food made with a little care and patience creates memories that last way longer than the meal itself.
Ingredients
- Active dry yeast (2 1/4 teaspoons or 1 packet): This is your magic ingredient—use fresh yeast from a sealed packet for the best rise and fluffiest knots. I always keep mine in the fridge to extend its life.
- Warm water (1 cup, about 110°F/43°C): The temperature matters more than you'd think; too hot kills the yeast, too cold and it won't activate. I use my wrist to test it—it should feel warm but not hot, like a baby's bath water.
- Granulated sugar (2 tablespoons): This feeds the yeast and helps it bloom beautifully. Don't skip it thinking you're being healthy; it's essential to the chemistry of the dough.
- All-purpose flour (2 1/2 cups plus more for dusting): Quality matters here; I use unbleached flour when I can because it seems to give a better texture. Have extra on hand for kneading and shaping.
- Salt (1 teaspoon plus 1/4 teaspoon for garlic butter): This strengthens the dough structure and balances all the flavors—don't underestimate its importance in bread-making.
- Olive oil (2 tablespoons for dough, plus 1/4 cup melted butter): The oil in the dough keeps it tender, while the melted butter in the topping is where the real magic happens—use good quality if you can taste the difference.
- Fresh garlic (3 cloves, finely minced): Fresh is non-negotiable here; jarred garlic won't give you that punchy, fragrant flavor that makes these knots sing.
- Fresh parsley (2 tablespoons, finely chopped): This adds brightness and color—I often snip it fresh from my kitchen windowsill herb pot moments before using it.
- Parmesan cheese (2 tablespoons, grated and optional): If you add it, use freshly grated; pre-grated has anti-caking agents that affect how it melts and tastes on the warm bread.
Instructions
- Activate Your Yeast:
- Combine warm water, sugar, and yeast in a small bowl and let it sit for about 5 minutes. You're looking for a foamy, bubbly mixture—this tells you the yeast is alive and ready to work its magic. If it doesn't foam, your yeast is dead and you need to start over with fresh yeast.
- Build the Dough Base:
- In your large bowl, mix flour and salt together, then add the yeasty water and olive oil. Stir until everything comes together into a shaggy, rough dough. Don't worry about it looking messy right now—that's exactly what you want.
- Knead Until Silky:
- Transfer your dough to a floured surface and knead for 5 to 7 minutes. You'll feel it transform under your hands from rough and sticky to smooth and elastic. Press it with the heel of your hand, fold it over, rotate, and repeat. When it's ready, it'll spring back gently when you poke it.
- Let It Rise and Rest:
- Place your kneaded dough in a lightly oiled bowl, cover it with a damp kitchen towel, and set it somewhere warm—a sunny windowsill or the top of your refrigerator works beautifully. You're waiting for it to double in size, which usually takes about 1 hour. Resist the urge to peek too often; just trust the process.
- Shape Your Knots:
- Once your dough has risen beautifully, preheat your oven to 400°F and line a baking sheet with parchment paper. Punch down the dough to release the air, then divide it into 12 equal pieces—I use a bench scraper and my hands to make sure they're roughly the same size. Roll each piece into a rope about 7 inches long, then gently tie it into a loose knot. This is where the fun happens—don't worry if your knots aren't perfect; they'll look rustic and charming.
- Second Rise and Garlic Magic:
- Place your shaped knots on the baking sheet, cover them loosely with a towel, and let them rest for 10 minutes while you prepare the garlic butter. Mix your melted butter, minced garlic, fresh parsley, and salt together in a small bowl. The aroma that rises from this mixture is pure comfort.
- Brush and Bake:
- Brush each knot generously with your garlic butter mixture—don't hold back; this is where all the flavor lives. Slide them into your preheated oven and bake for 15 to 18 minutes, until they're golden brown and smell absolutely incredible. Your kitchen will smell like an Italian bakery, and neighbors might start appearing at your door.
- Final Touch:
- Remove the knots from the oven and brush them one more time with the remaining garlic butter while they're still hot. If you're using Parmesan, sprinkle it on now while the butter is still melting into the knots. Let them cool for just a minute or two before serving—if you can wait that long.
 Save
Save There's a moment about 45 minutes into making these when you know you made the right choice—when the dough has risen perfectly, when you're shaping the knots and feeling that silky dough between your fingers, when the aroma hits you as they come out of the oven. That's when you realize homemade bread isn't complicated or intimidating; it's just yeast, flour, and time working together while you do something else. It's kitchen magic that anyone can make.
The Art of Tying Your Knots
The beauty of garlic knot bread is that your knots don't need to be perfect to be delicious. I learned this the hard way by tying them too tight the first time and ending up with dense, tough knots instead of pillowy ones. The trick is to tie them loosely—think of it as a gentle suggestion rather than a tight constraint. Roll your dough rope into about a 7-inch length, loop it over itself, and tuck the end through the loop with a light hand. When they bake, they'll puff up beautifully, and if yours look a little lumpy or asymmetrical, that's part of their charm. Your second rising on the baking sheet is crucial; it gives them space to bloom into their full, fluffy potential.
Timing and Temperature Control
I used to rush the rising process and wonder why my bread never tasted as good as bakery bread. The secret is patience and warmth. Give your dough the full hour for the first rise in a warm spot—this develops flavor and creates that tender, open crumb structure that makes these knots so special. If your kitchen is cold, you can use a trick I discovered: turn your oven on for just 30 seconds, then turn it off and place your covered dough inside. The residual warmth creates a perfect rising environment. The second rise is shorter because the dough is already experienced, but don't skip it—those 10 minutes make the difference between dense and airy.
Flavor Variations and Serving Ideas
Once you've mastered the basic garlic knot, the door opens to so many possibilities. I've experimented with adding a pinch of crushed red pepper to the garlic butter for a subtle kick, and it transforms the flavor in the best way. Some nights I mix in dried oregano or Italian seasoning into the parsley mixture, which gives them a more pronounced herbaceous note. For serving, warm marinara sauce for dipping is classic, but I've also served them with a simple olive oil and balsamic for dipping, or alongside soups and stews where they soak up every last bit of flavor. The knots stay fresh in an airtight container for a day and reheat beautifully in a gentle oven—just brush them lightly with water and warm them at 325°F for about 10 minutes.
- Try adding a small pinch of crushed red pepper to the garlic butter for subtle heat that doesn't overpower
- Make ahead and refrigerate the unbaked knots, then bake them fresh whenever you want warm bread
- These freeze beautifully too; thaw at room temperature and reheat gently for breakfast bread or snacks
 Save
Save Making garlic knot bread teaches you something beautiful about cooking: the simplest ingredients, treated with care and patience, create something remarkable. Every time you pull a warm batch from the oven, you're creating a moment worth savoring.
Common Recipe Questions
- → What type of flour is best for these knots?
-
All-purpose flour works well to create a soft, elastic dough suitable for shaping and rising.
- → How do I achieve the soft texture in the knots?
-
Allowing the dough to rise fully and kneading it until smooth helps develop gluten, resulting in a soft, pillowy texture.
- → Can I add extra flavor to the garlic butter?
-
Yes, a pinch of crushed red pepper adds a subtle heat to the garlic butter blend.
- → How should the knots be stored after baking?
-
Store them in an airtight container at room temperature and reheat gently to maintain softness.
- → What is a good accompaniment for serving?
-
Marinara sauce or similar dips complement the garlicky flavor and add a savory element.
