 Save
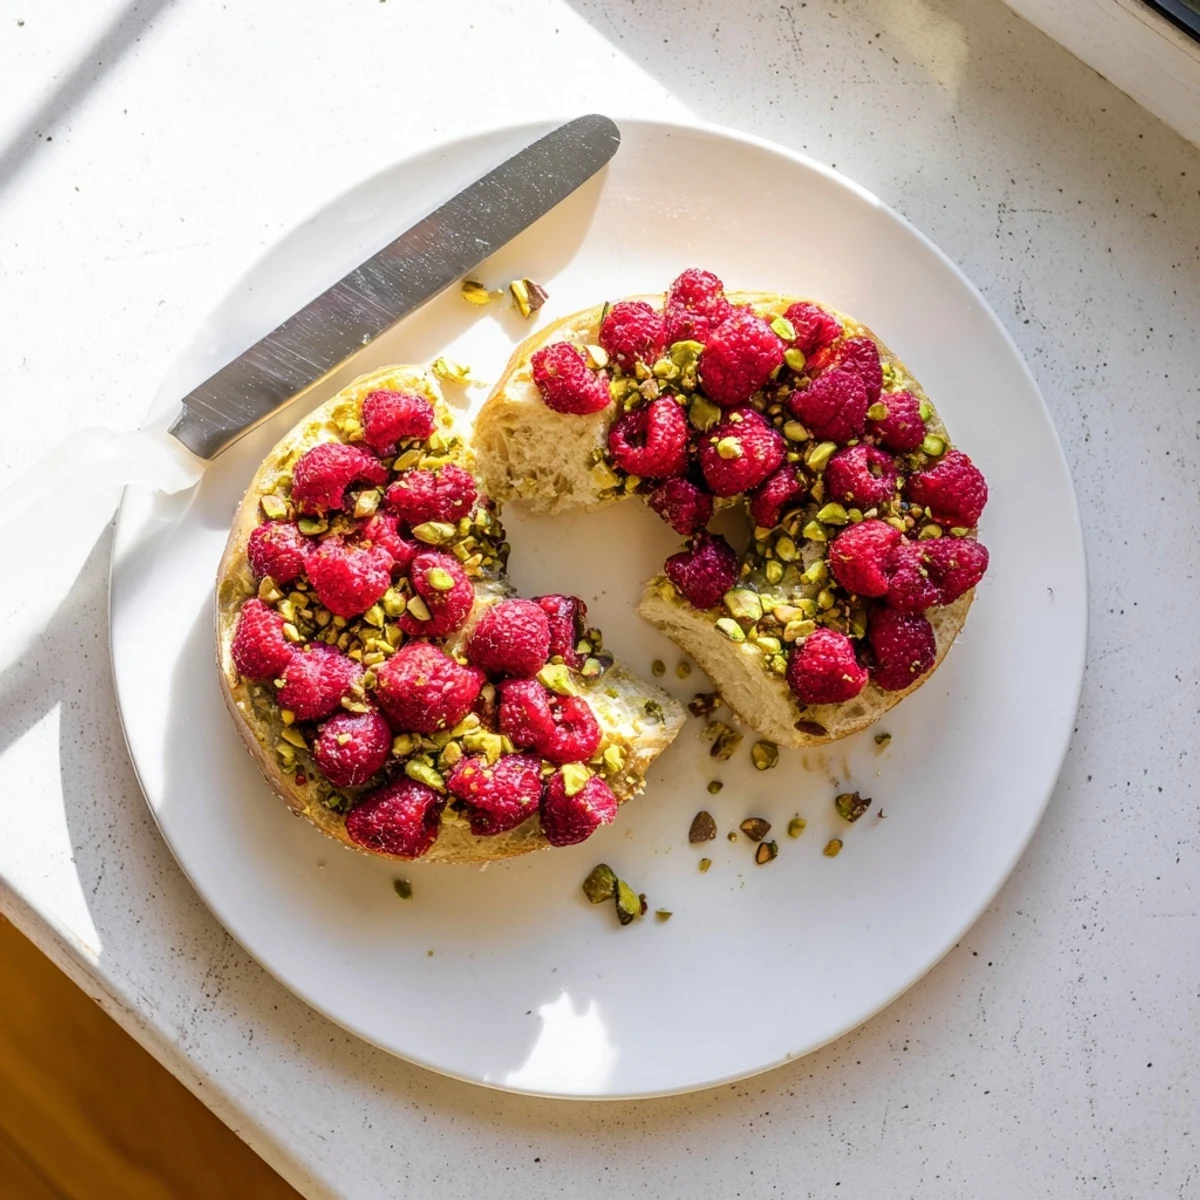
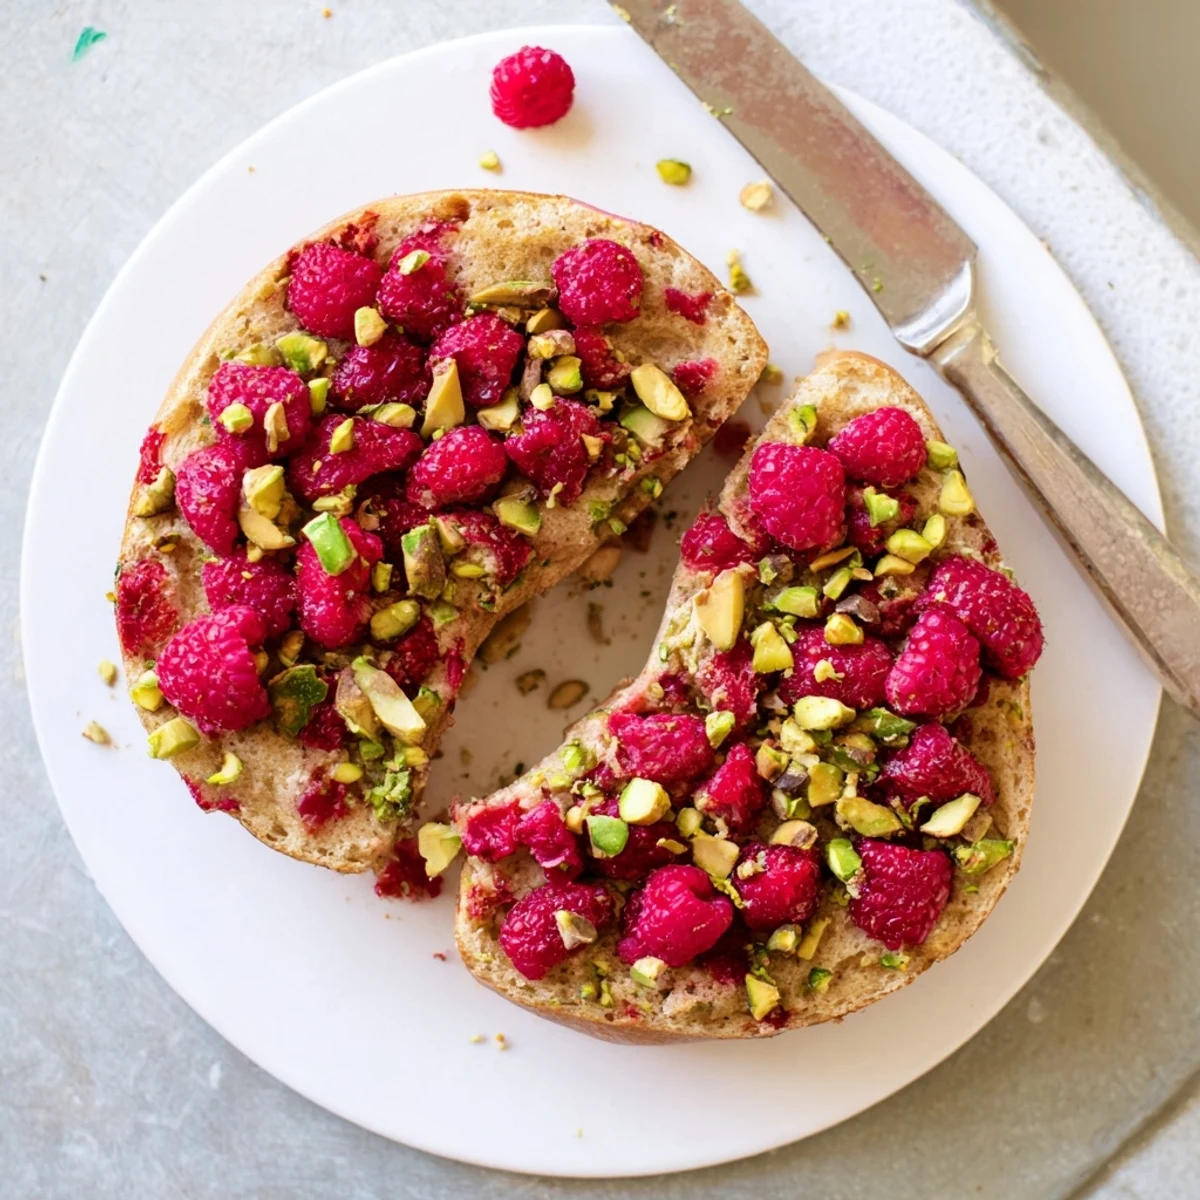
Save These artisan bagels combine the tangy complexity of sourdough with sweet-tart raspberries and buttery pistachios. The long fermentation develops deep flavor while creating that signature chewy interior and shiny crust. Perfect for weekend brunch, they freeze beautifully and toast up perfectly days later.
The first time I pulled these from the oven, my kitchen smelled like a bakery collided with a berry patch. I had been experimenting with sourdough bagels for weeks, and something about the tart raspberries cutting through that earthy pistachio richness just clicked. My roommate wandered in, drawn by the scent, and we ended up eating three warm ones straight from the cooling rack.
I made these for a weekend brunch last summer when friends were visiting from out of town. We sat on the back porch for hours, slathering warm bagels with cream cheese and watching the morning light shift across the yard. They kept asking what made these taste so different from store bought, and honestly it is that overnight fermentation working its magic.
Ingredients
- 100 g active sourdough starter: This needs to be fed and bubbly, ideally at its peak activity, to give your bagels proper rise and that signature tangy flavor
- 300 g warm water: Use water around 80°F to activate the starter without killing any of those wild yeast cultures you have nurtured
- 450 g bread flour: High protein flour is essential here for that chewy bagel texture we are all after
- 50 g whole wheat flour: Just enough to add subtle nuttiness and structure without making the bagels too dense
- 10 g salt: Do not skimp here, salt is what balances the sweetness from the berries and malt syrup
- 30 g granulated sugar: Feeds the sourdough and helps create that beautiful golden crust in the oven
- 100 g fresh or frozen raspberries: Frozen berries actually work better here since they hold their shape and do not turn the dough completely pink
- 60 g shelled unsalted pistachios: Roughly chop these so you get little pockets of crunch throughout each bite
- 2 L water for poaching: This bath is what gives bagels their signature shiny chewy crust
- 1 tbsp baking soda: Creates that alkaline environment in the poaching liquid, mimicking traditional bagel shops
- 1 tbsp barley malt syrup or honey: Adds subtle sweetness and helps the toppings cling after poaching
- Extra toppings: More chopped pistachios and freeze dried raspberry pieces make these look absolutely stunning
Instructions
- Mix your dough base:
- Dissolve that bubbly sourdough starter in warm water until it is fully incorporated, then stir in both flours, salt, and sugar until you have a shaggy, sticky mass that looks a bit messy
- Work the gluten:
- Knead by hand for about 10 minutes or let your stand mixer do the work for 7 minutes until the dough transforms from sticky to smooth and elastic, springing back when you poke it
- Gentle berry incorporation:
- Fold in your raspberries and chopped pistachios with a light hand, just until they are scattered throughout
- Overnight fermentation:
- Cover the bowl and let it sit at room temperature for 8 to 10 hours while you sleep, watching the dough slowly double in size and develop those complex fermented flavors
- Shape into bagels:
- Divide the dough into 8 equal pieces, roll each into a tight ball, rest them for 10 minutes to relax the gluten, then poke a hole through the center with a floured finger and gently stretch into that classic bagel ring
- Final proof:
- Arrange your shaped bagels on a parchment lined baking sheet, cover loosely with a towel, and let them proof at room temperature for 1 to 2 hours until they look slightly puffy and feel light to the touch
- Prepare your poaching liquid:
- Preheat your oven to 425°F and bring 2 liters of water to a rolling boil in your largest pot, then stir in the baking soda and malt syrup or honey
- The crucial boil:
- Carefully drop 2 or 3 bagels at a time into the boiling water
- Add those finishing touches:
- Immediately after poaching, sprinkle the wet bagels with extra chopped pistachios and pieces of freeze dried raspberries while the surface is still tacky so everything adheres
- Bake to golden perfection:
- Slide the tray into your hot oven and bake for 22 to 25 minutes, rotating halfway through, until the bagels are deeply golden brown and sound hollow when tapped on the bottom
 Save
Save My aunt visited last fall and requested these for breakfast every morning of her stay. She is gluten intolerant but decided to risk it just this once, standing at the counter with cream cheese on her chin, declaring it absolutely worth it. That is when I knew this recipe was something special.
Making Sourdough Work For You
If your starter has been neglected in the back of the fridge, feed it twice over 24 hours before using it in this recipe. I have found that a cold, neglected starter produces bagels that do not rise as well and lack that characteristic tangy flavor. The night before you plan to bake, take your starter out, let it come to room temperature, and feed it equal parts flour and water. By morning it should be bubbly, doubled in size, and ready to give your bagels the perfect lift.
Perfecting That Chewy Texture
The poaching step is what separates bagels from regular bread, so do not be tempted to skip it. That boiling water with baking soda gelatinizes the surface starch, creating that distinctive shiny, chewy crust bagel lovers crave. I experimented once with skipping the boil, and while they were still tasty, they were basically just round bread with some stuff mixed in. The real magic happens in that brief minute per side in the bubbling water.
Freezing For Busy Mornings
These bagels freeze beautifully and actually taste pretty close to fresh when reheated properly. Slice them in half before freezing so you can pop them directly into the toaster. Wrap each bagel individually in plastic wrap, then place them all in a freezer safe bag for up to one month.
- Toast frozen bagels on the darkest setting for that fresh baked crispiness
- Let them thaw at room temperature for 20 minutes if you prefer a softer texture
- Never microwave frozen bagels unless you enjoy eating tough rubber
 Save
Save There is something deeply satisfying about pulling homemade bagels from the oven, especially ones that look this beautiful. Hope these bring as much joy to your kitchen as they have to mine.
Common Recipe Questions
- → Can I use fresh raspberries instead of frozen?
-
Fresh raspberries work but tend to break down more during kneading, creating a pink swirl throughout your dough. Frozen berries hold their shape better and distribute more evenly without excessive color bleeding.
- → How do I know when my bagels are properly proofed?
-
Look for slight puffiness—the bagels should feel lighter and look a bit expanded. A gentle finger press should spring back slowly. Over-proofed bagels may collapse in the water, while under-proofed ones won't develop that signature shiny crust.
- → What does the baking soda do in the poaching liquid?
-
Baking soda increases alkalinity, which helps develop that glossy, professional-looking crust during baking. Combined with malt syrup or honey, it creates the bagel's characteristic chewy exterior and deep golden color.
- → Can I skip the poaching step?
-
Poaching is essential for authentic bagel texture—without it, you'll have bread shaped like bagels. The boiling water sets the exterior structure, creating that distinct dense chew and shiny crust that separates bagels from other breads.
- → How should I store these bagels?
-
Keep at room temperature for 2-3 days in a paper bag to maintain crust texture. For longer storage, freeze sliced bagels in airtight bags for up to a month—they toast beautifully straight from frozen.
- → Can I make these without a sourdough starter?
-
You can substitute with commercial yeast, but you'll lose the complex tangy flavor and extended fermentation benefits. Use 7g instant yeast and reduce the first rise to 1-2 hours instead of overnight.
